A few years ago there was a hot topic on the
Yahoo Proto-Layouts group about something called a Pot Topper. Someone had found in the aisles containing stuff to make potted fake floral arrangements at a Michaels craft store a curious disk of static grass. It was supposed to look like a mossy planting top, hence "Pot Topper", but to us modelers it looked like something that could be cut up to look like weedy or grassy patches.
Intrigued by the online conversation, I went to a Michaels and found one for probably 5 or 6 bucks. It looked promising but I had no reason to use it at the time so it sat on my shelf until now. At some point in time Michaels stopped stocking them in my area but I wonder what they thought of the sudden uptick in pot topper sales that month, or maybe they were happy to finally get rid of them.
With pot toppers gone, another cheap alternative to store bought static grass patches is with a static grass applicator. You can
make your own with a baking pan and some spots of glue.
 |
| Pot Topper chunk |
Anyways years later my pot topper finally meets it's destiny on my scenery test module.
The Pot Topper is a disk of white fluffy poly fiber stuffing material coated in a brown dirt/sawdust material with the bright green static grass applied on top. Using scissors I cut off the bottom then trimmed as much of the stuffing off the bottom of the grassy side as possible. I then cut it up into several organic looking shapes and placed a few pieces in the low area in the module front and a couple on the hill tops in the back.
 |
| Trimming a Pot Topper piece |
 |
| Pot Topper placement |
I thought about using white glue or matte medium to attach the pot topper pieces, but they were to springy and would need to be weighted down. Also I really wanted to keep moving on this part of the project so out came the glue gun. This ended up being a great decision and really helped over come the springiness of the pot topper and sped things along.
After using the glue gun on the pot toppers and especially on gluing the chunks of foam together, I learned my cheap little model is barely adequate. A few squeezes of the trigger and the heating element can hardly keep up with the demand. It's come in handy a couple times so far, but when I get into major layout construction a bigger model will be a good upgrade.
 |
| Years ago I bought probably the cheapest glue gun I could find. Sometimes it's a good idea to spend a little more to get something better. |
With the pot topper pieces glued in place it was time to move on to using coarser ground foams on the rest of the scene.
 |
| Woodland Scenics Coarse Turf foam selection |
I collected a variety of Woodland Scenics ground foams for this project. For the most part I found it better to dump them out into sandwich bags for easier handling.
These were the ground foams I used.
- Earth Coarse Turf
- Burnt Grass Coarse Turf
- Light Green Coarse Turf
- Medium Green Coarse Turf
- Dark Green Coarse Turf
- Medium Green Underbrush
- Olive Green Bushes
- Light Green Bushes
- Medium Green Foliage Net
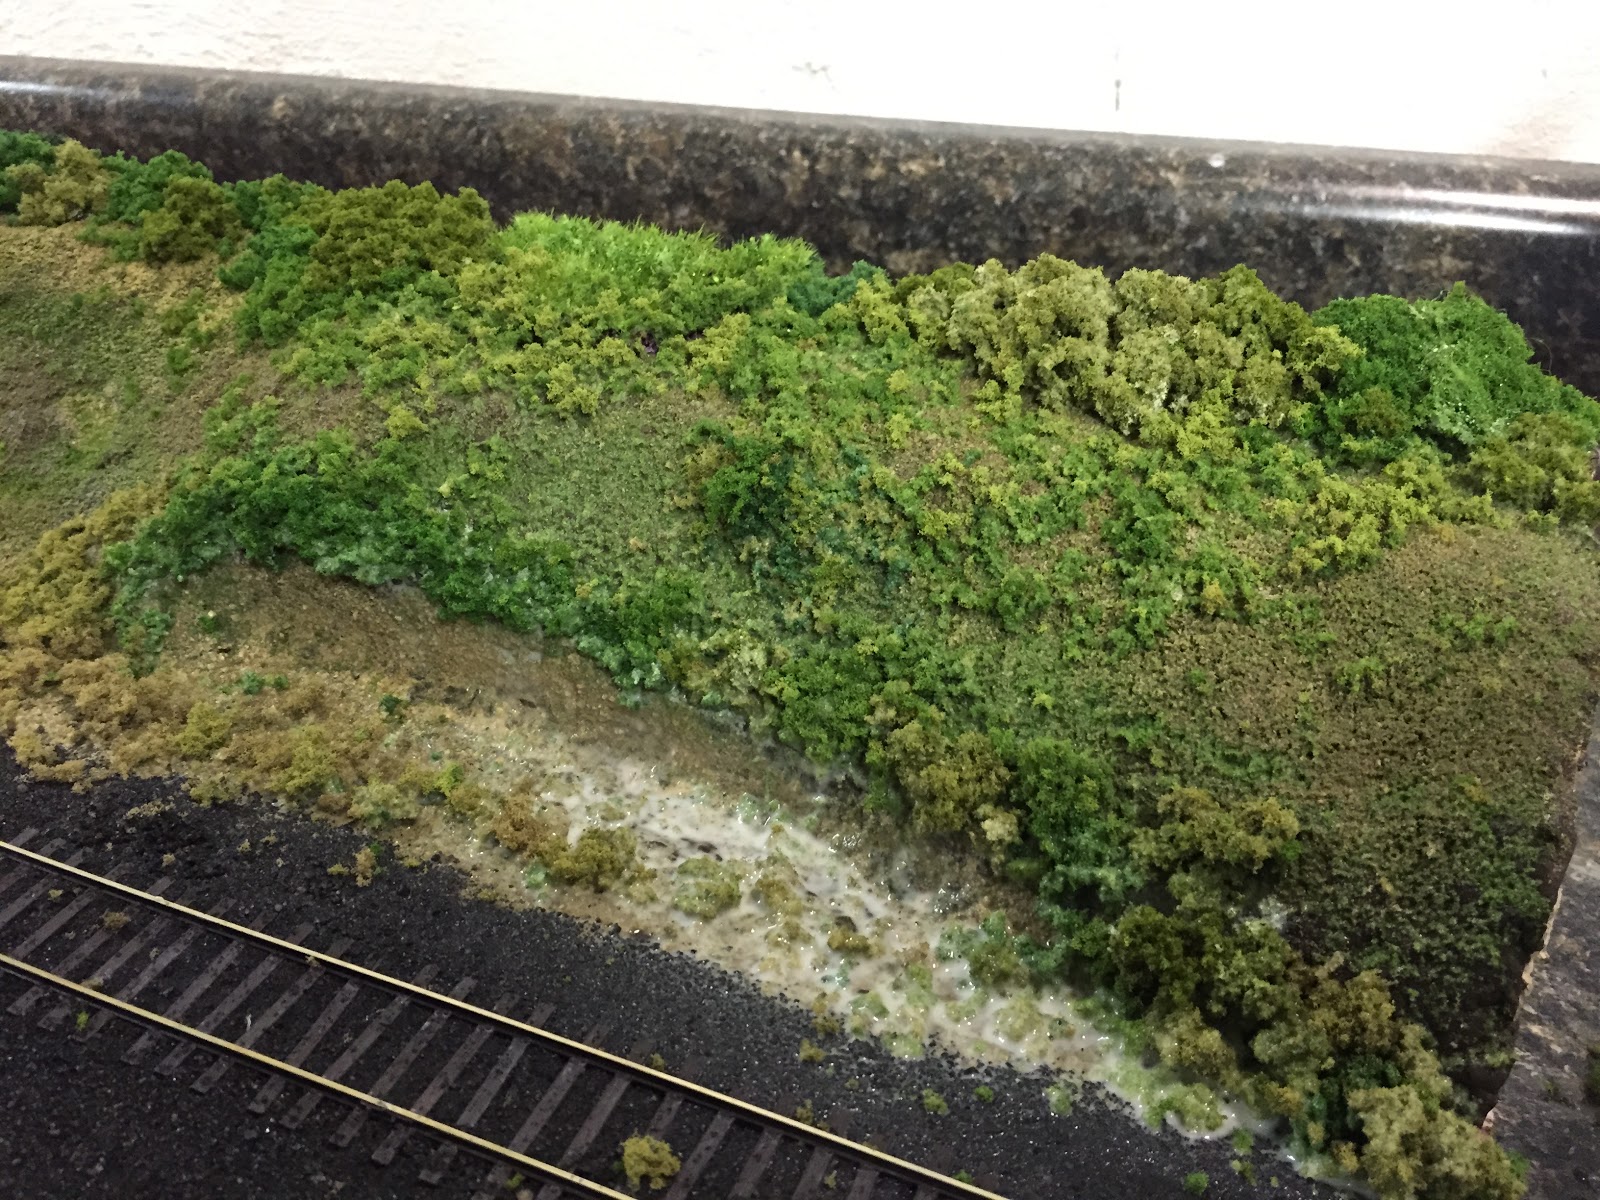
I tried to keep changing foam colors and not let one dominate an area too much. I piled coarse foams along the pot topper edges to help blend them into the scenery better using colors that matched. Along the edge of the ballast I used the earth and burnt grass for the look of dead or dying grass.
When I was happy with the look for the area I was working on, I fixed the ground foam cover in place. I used the same alcohol mist for wetting and the 4:1 diluted white glue for the ground foams as I did for the ballast. I used a lot of my glue mixture doing the ballast, so during this phase of scenery I started pouring it into a yellow lid top to make it easier to fill my eyedropper. Also while things were still wet I sprinkled a little bit of Noch leaves on the pot topper pieces.
I noticed any wet water spray or glue floods that happened along the ballast softened the glue binding the sand/aquarium gravel to the point that it could be disturbed if touched. A few times I had to pat the ballast back to shape but once dry again it turned rock hard.
 |
| Front of module finished and glue soaked |
With the front of the module done I continued on to the backside.
Here on the tops of the hills I wanted to thicken things a bit by using Woodland Scenics Bushes and Underbrush foams. I knew that these would be difficult to get to stay in place so I coated the area with brushed on matte medium. Again I tried to blend in the edges of the pot toppers and vary the colors used while also including the small coarse foams like the module front.
 |
| Work begins on the back track side hills. |
 |
| Applying underbrush foam to the brow of an undercut. |
Getting the bushy undergrowth foam to stick the top brow of the eroded hillsides was probably the most trouble I ran across during this phase of scenery. Letting the Modge Podge set for a bit before applying the underbrush helped. I thought about cheating and tilting the whole module so that spot was horizontal, but I knew I might not have those options when working on the future layout. That's what this project is for, learning how to solve issues and learn from any mistakes.
One thing I learned from this part of the project was to use full strength white glue on the bushy stuff. The matte medium did its job eventually but the white glue was thicker and would probably do better to hold scenery materials on a steep hillside right from the start.
 |
| Back of module finished and glue soaked. |
Once I was done with the ground foams and I looked the module over I realized I still wasn't happy with the bare earth patches on the hillsides. So I redid them by misting the area first with wet water and then tapping a spoon of more dirt on those areas adding some dirt piles to the bottom of the patches. I then misted again with the wet water and flowed diluted glue on the dirt spots.
Afterward they seemed to stand out more and I think it looked a lot better.
While I had the mesh screen out to sift dirt for the hillside, I decided to tackle the road right afterwards. I wanted the look of a gravel road, but I hadn't really done any research on how to do one.
Luckily I had an idea before I even thought to walk over to the computer. I think it worked out pretty well.
 |
| Fresh dirt along the back hill and wet cement that will hopefully look like a gravel road. |
Using Quikcrete Hydraulic Cement in a yellow bucket I had on hand, I
sifted it through a fine mesh over the road area. Then I gently misted
water from high over top until the whole road was wet.
At this point I let the module sit overnight for everything to dry.
 |
| Glues and cement are dry. I couldn't help but to add some hoppers to set the scene. |
By morning all the glue was pretty much dried and the road looked better than I thought for a spur of the moment idea.The road is not rock solid like concrete and is a bit dusty but it seems to be holding up well. We'll see what happens over time with it.
 |
| Major scenery work complete. |
Putting down the coarse ground foams and bushes over the whole module and adding the gravel road took about 2 1/2 hours. The time went by really fast and I really enjoyed myself while doing it. I now feel that any fear I had of doing scenery is mostly gone and replaced with a want to do more.
Next up, trying out real static grass.
Quick links to the rest of this Series
Scenery Test Module Part 5
Scenery Test Module Part 5a