Showing posts with label Benchwork. Show all posts

Wednesday, June 12, 2024

Update 2024 - Rebuilding a Better Pine Valley Yard: Part 1

It's been a while since an update to say the least, 2021? Wow!  I think we all know that life happens and sometimes hobbies get put on the back burner for a bit. So with that out of the way here's what's been happening on the Adena Railroad.

Tear Out

In the spring of 2023 while the layout was mostly mothballed, the water line to my refrigerator sprung a leak. Luckily the damage was limited but the repair work required the removal of a section of my Pine Valley Yard at Dillionvale, OH. I had been mildly unhappy with the design for a while so tearing it all out wasn't too painful. The yard passed through stair supports and then jutted out as a peninsula into the near middle of the laundry side of the basement that over time proved to be just too cramped.

Pine Valley tear out in May 2023

It wasn't too hard to find a new home for the Pine Valley, an old layout plan had the yard in a sort of J shape along a far basement wall, but required a swing gate in front of the stairs. This required 15-20 feet more mainline between Adena yard and Pine Valley yard and the chance to model some of the hills and a tunnel between the two points. This addition came with the expense of a coal branch being drastically shortened in place of the new yard location.

The new plan also allowed me to better capture the prototypical track plan of the real Pine Valley yard, thereby enhancing operations to produce the need for a fulltime yardmaster position.

W&LE Pine Valley Yard Valuation Map, partially colored for my own visual reference

Construction

In November 2023 I started the construction of the new mainline from Adena to Pine Valley. I began with completely rebuilding a section that ran behind the furnace to make it easier to remove if necessary. The new mainline needed a constant 1.25% grade from Adena to Pine Valley to allow the main to exit to staging at a particular height to clear some existing benchwork. This also helped to replicate the grade out of the Ohio River Valley and will require double headed steam just like the prototype.

By January 2024 I had the new mainline in place. Scenery will include two bridges over the Short Creek and the Long Run tunnel. The natural spot for the tunnel was where the mainline snaked it's way through the basement stair supports.

New mainline section.

New mainline section, one of the many Short Creek bridges, this one is easily removable for the electrical panel access.

New mainline, Long Run Tunnel and Short Creek bridge section.

In April I made the removable section across the stairs that will eventually become a swing gate. The section slips into place with slots routed out to fit the ends of metal 2x2 L-brackets on each side.

Swing gate section

Surprisingly it's very sturdy 

My Son's last High School baseball season slowed down work but by the end of May, I had completed the box frames for the new and improved Pine Valley yard. I'd love to provide a nice looking track plan of all the changes but I usually work with pencil and paper plus large scale templates, but I'll try to get something together to show.

Pine Valley yard - Freight House/Station area

Pine Valley yard - Yard Office area

Pine Valley yard - yard, rip track, start of engine terminal

Pine Valley yard - Engine Terminal area

If you made it this far thanks!

Monday, July 19, 2021

Building the Ohio River Staging Yard

In my plans to model the NKP's Wheeling District and branch lines between Pittsburg Junction and Dillonvale/Pine Valley Yard, I knew I would need staging yards to hold trains going to or from the east and west ends of the layout.

A large east end staging yard is planned to start just a bit beyond Pittsburg Junction and will represent Brewster, Ohio. A large majority of traffic will flow to and from this direction on my layout, with much of this being coal loads and empty hoppers. As an interesting side note, WESTBOUND traffic was superior on the W&LE and later the Nickel Plate's Wheeling District.

The west end staging yard will begin beyond the Pine Valley Yard at Dillonvale and will represent the eastern end of the mainline at Terminal Junction near Martin's Ferry, Ohio and the end of the Stubenville Branch at Mingo Junction, Ohio. Because both ends of the main and branch follow the Ohio River, I've taken to referring to this staging yard as the Ohio River Staging Yard. The size of this staging yard will be more modest as during a potential 12 hour operating session only 5-6 trains might enter or exit. Mainly the eastbound TT fast freights and the Yorkville locals.

I always knew the Ohio River staging yard would be located under the Adena yard/wye benchwork and connect to Pine Valley with a steep grade and a swing out section but it was originally planned as a stub ended yard. However after laying out some of my 1/4 30" curve templates I realized I could fit a 5-6 track return loop yard instead! I decided to go ahead and build the loop since it would appease my son for running his big modern trains and make operation setup a little easier.

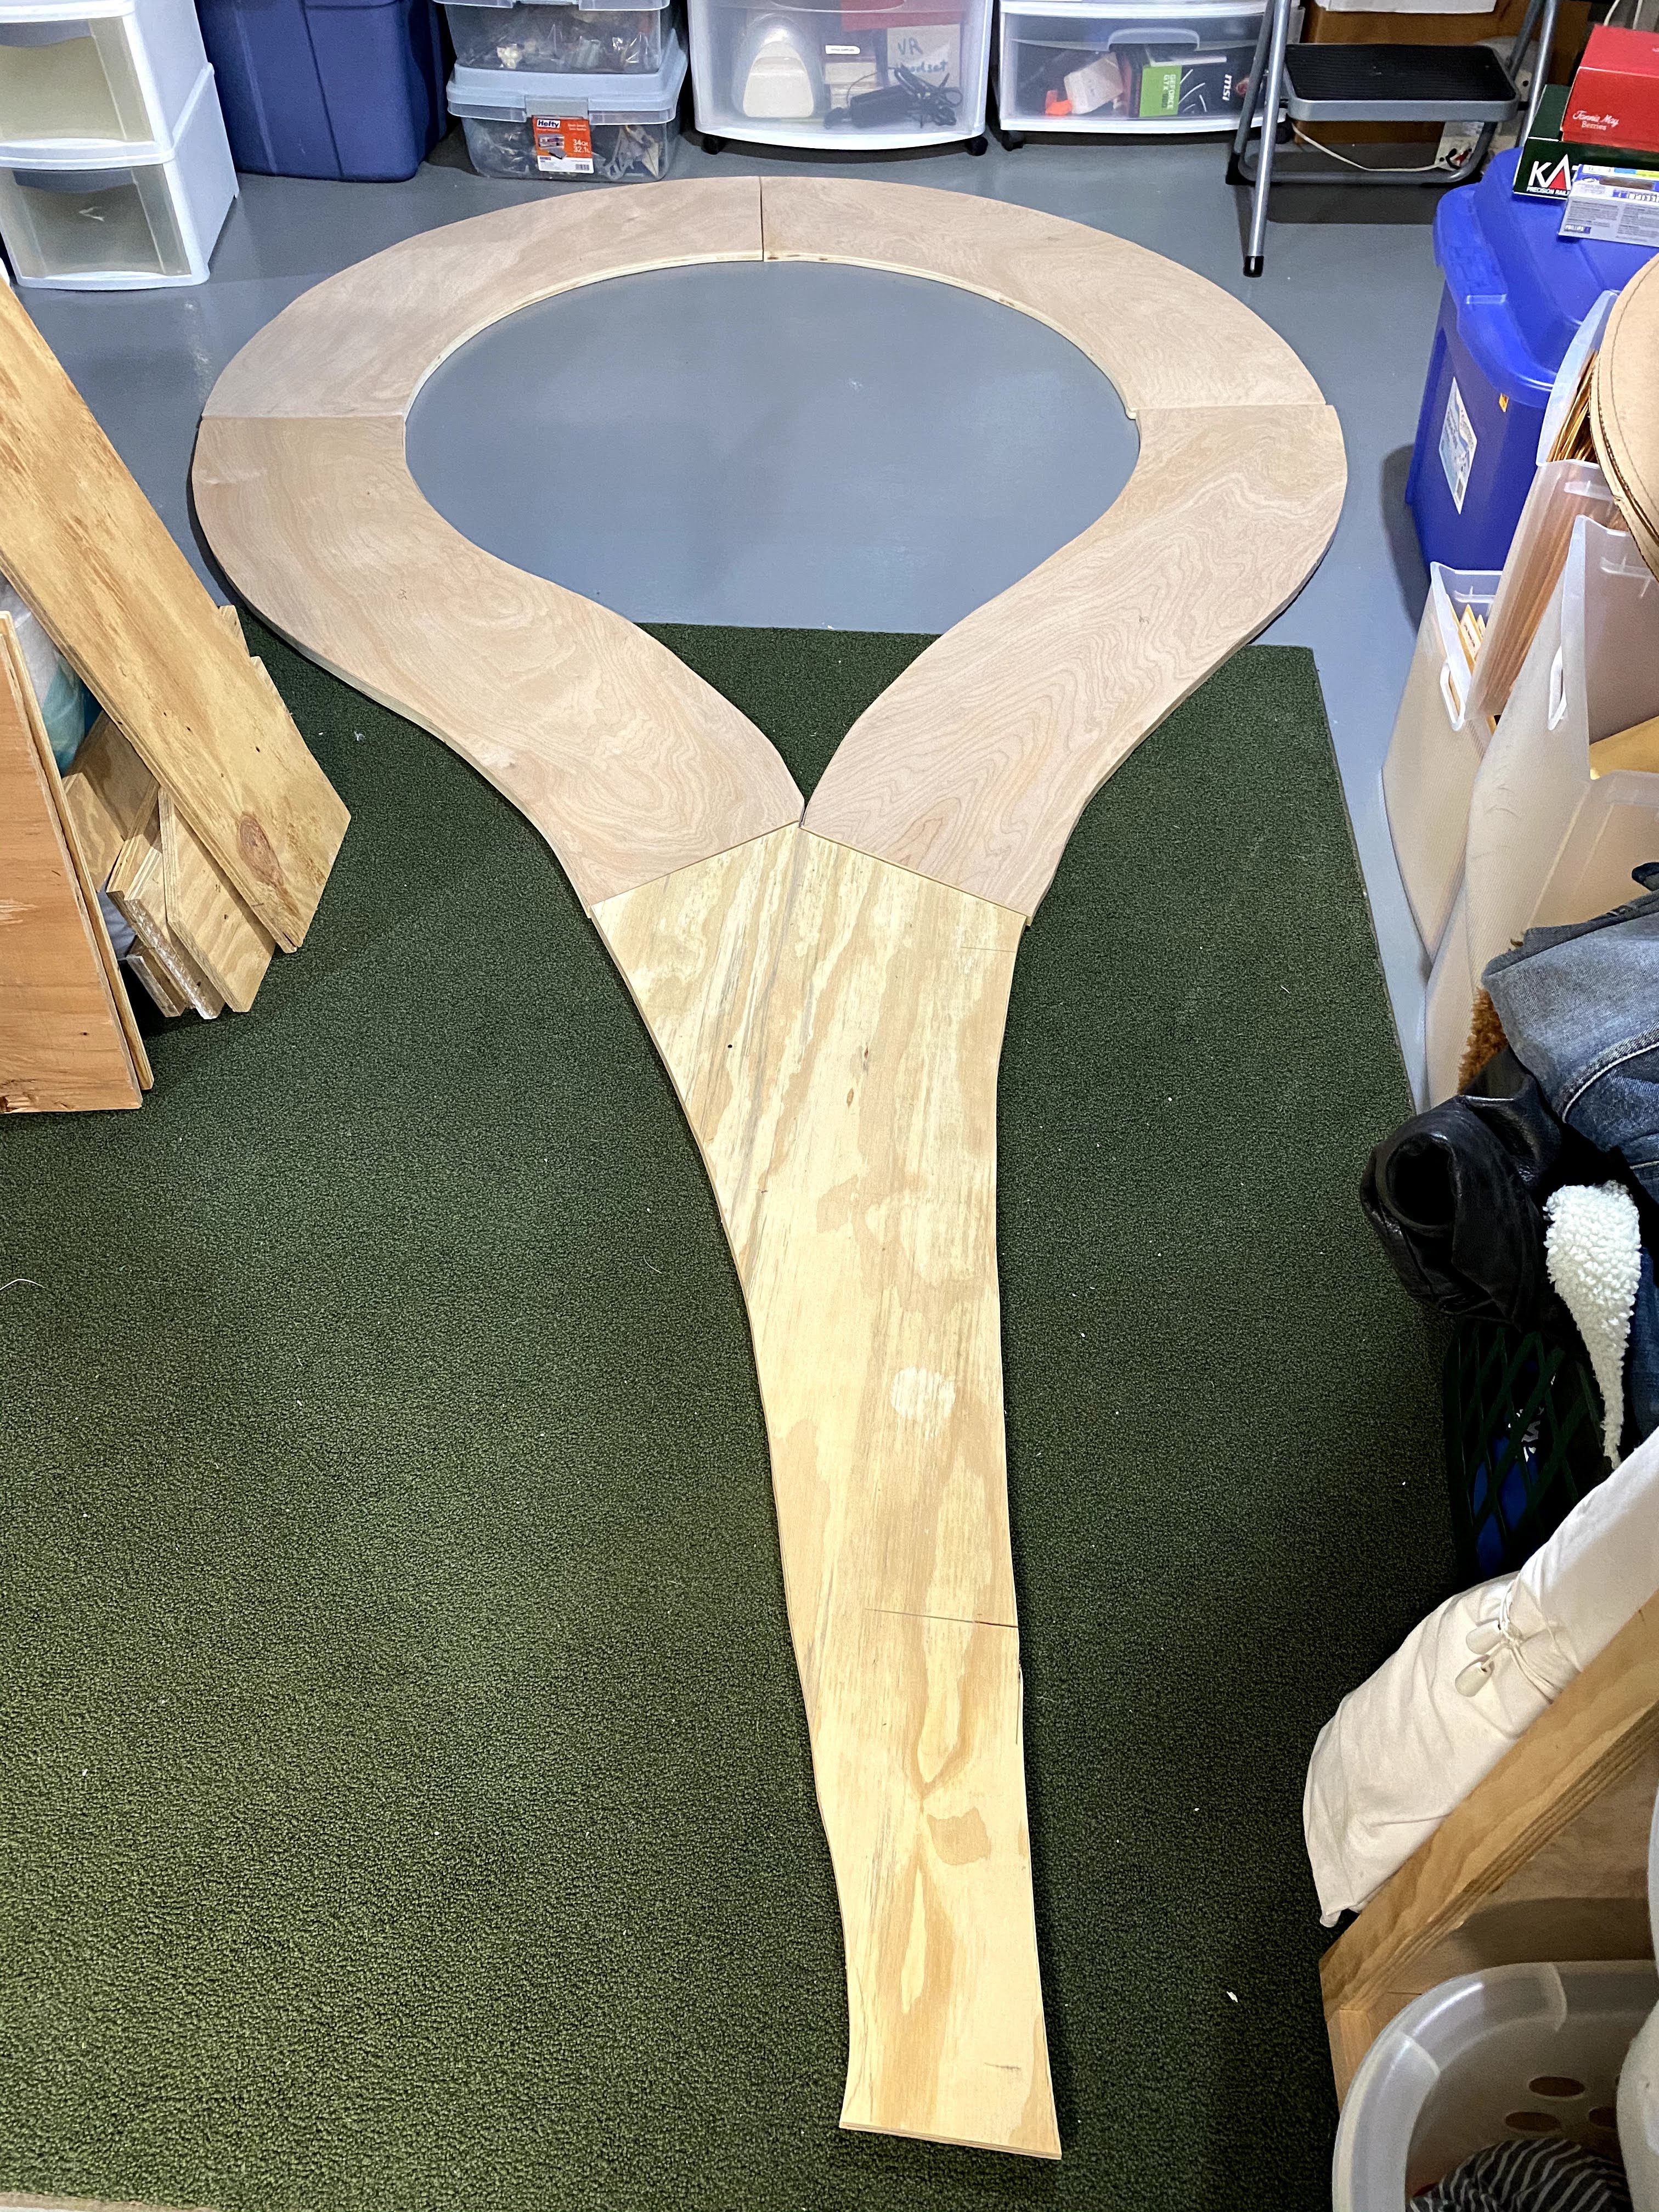
In the spring I started construction on the Ohio River staging yard. I used craft paper to create a template and also to make sure it would fit under the Adena wye in the corner of the room. I used birch plywood to create the 4 curved subsections but I switched to regular plywood for the rest of it when I ran out of the good stuff.

Staging Loop pre-splicing

I spliced all the prices together, installed the needed shelf bracket supports and designed the loop's turnout layout. When I attempted to place an order for the track I found the springtime quarantines and lockdowns had caused a run on hobby supplies and turnouts were out of stock. Around this time the weather warmed and personal developments caused me to loosely install the loop in place and literally shelve any layout progress until about late fall.

East end staging loop temporarily in place under the Adena Wye area

In October our one-eyed kitten Mo took a misstep while exploring the layout and fell off the loop on to the concrete floor below (he somehow didn't land on his feet!). I removed the loop and began work on it starting with some Masonite edge guards originally meant for trains but now serving double duty to protect a kitten with bad depth perception.

Mr. Mo posing with the staging loop and the inside set of guard rails installed.

Tracking laying and wiring started in earnest in mid December after I settled on the yard throat design to maximize the length of the outside track mostly to store and run Brendan's big modern trains.

Planned yard turnout arrangement

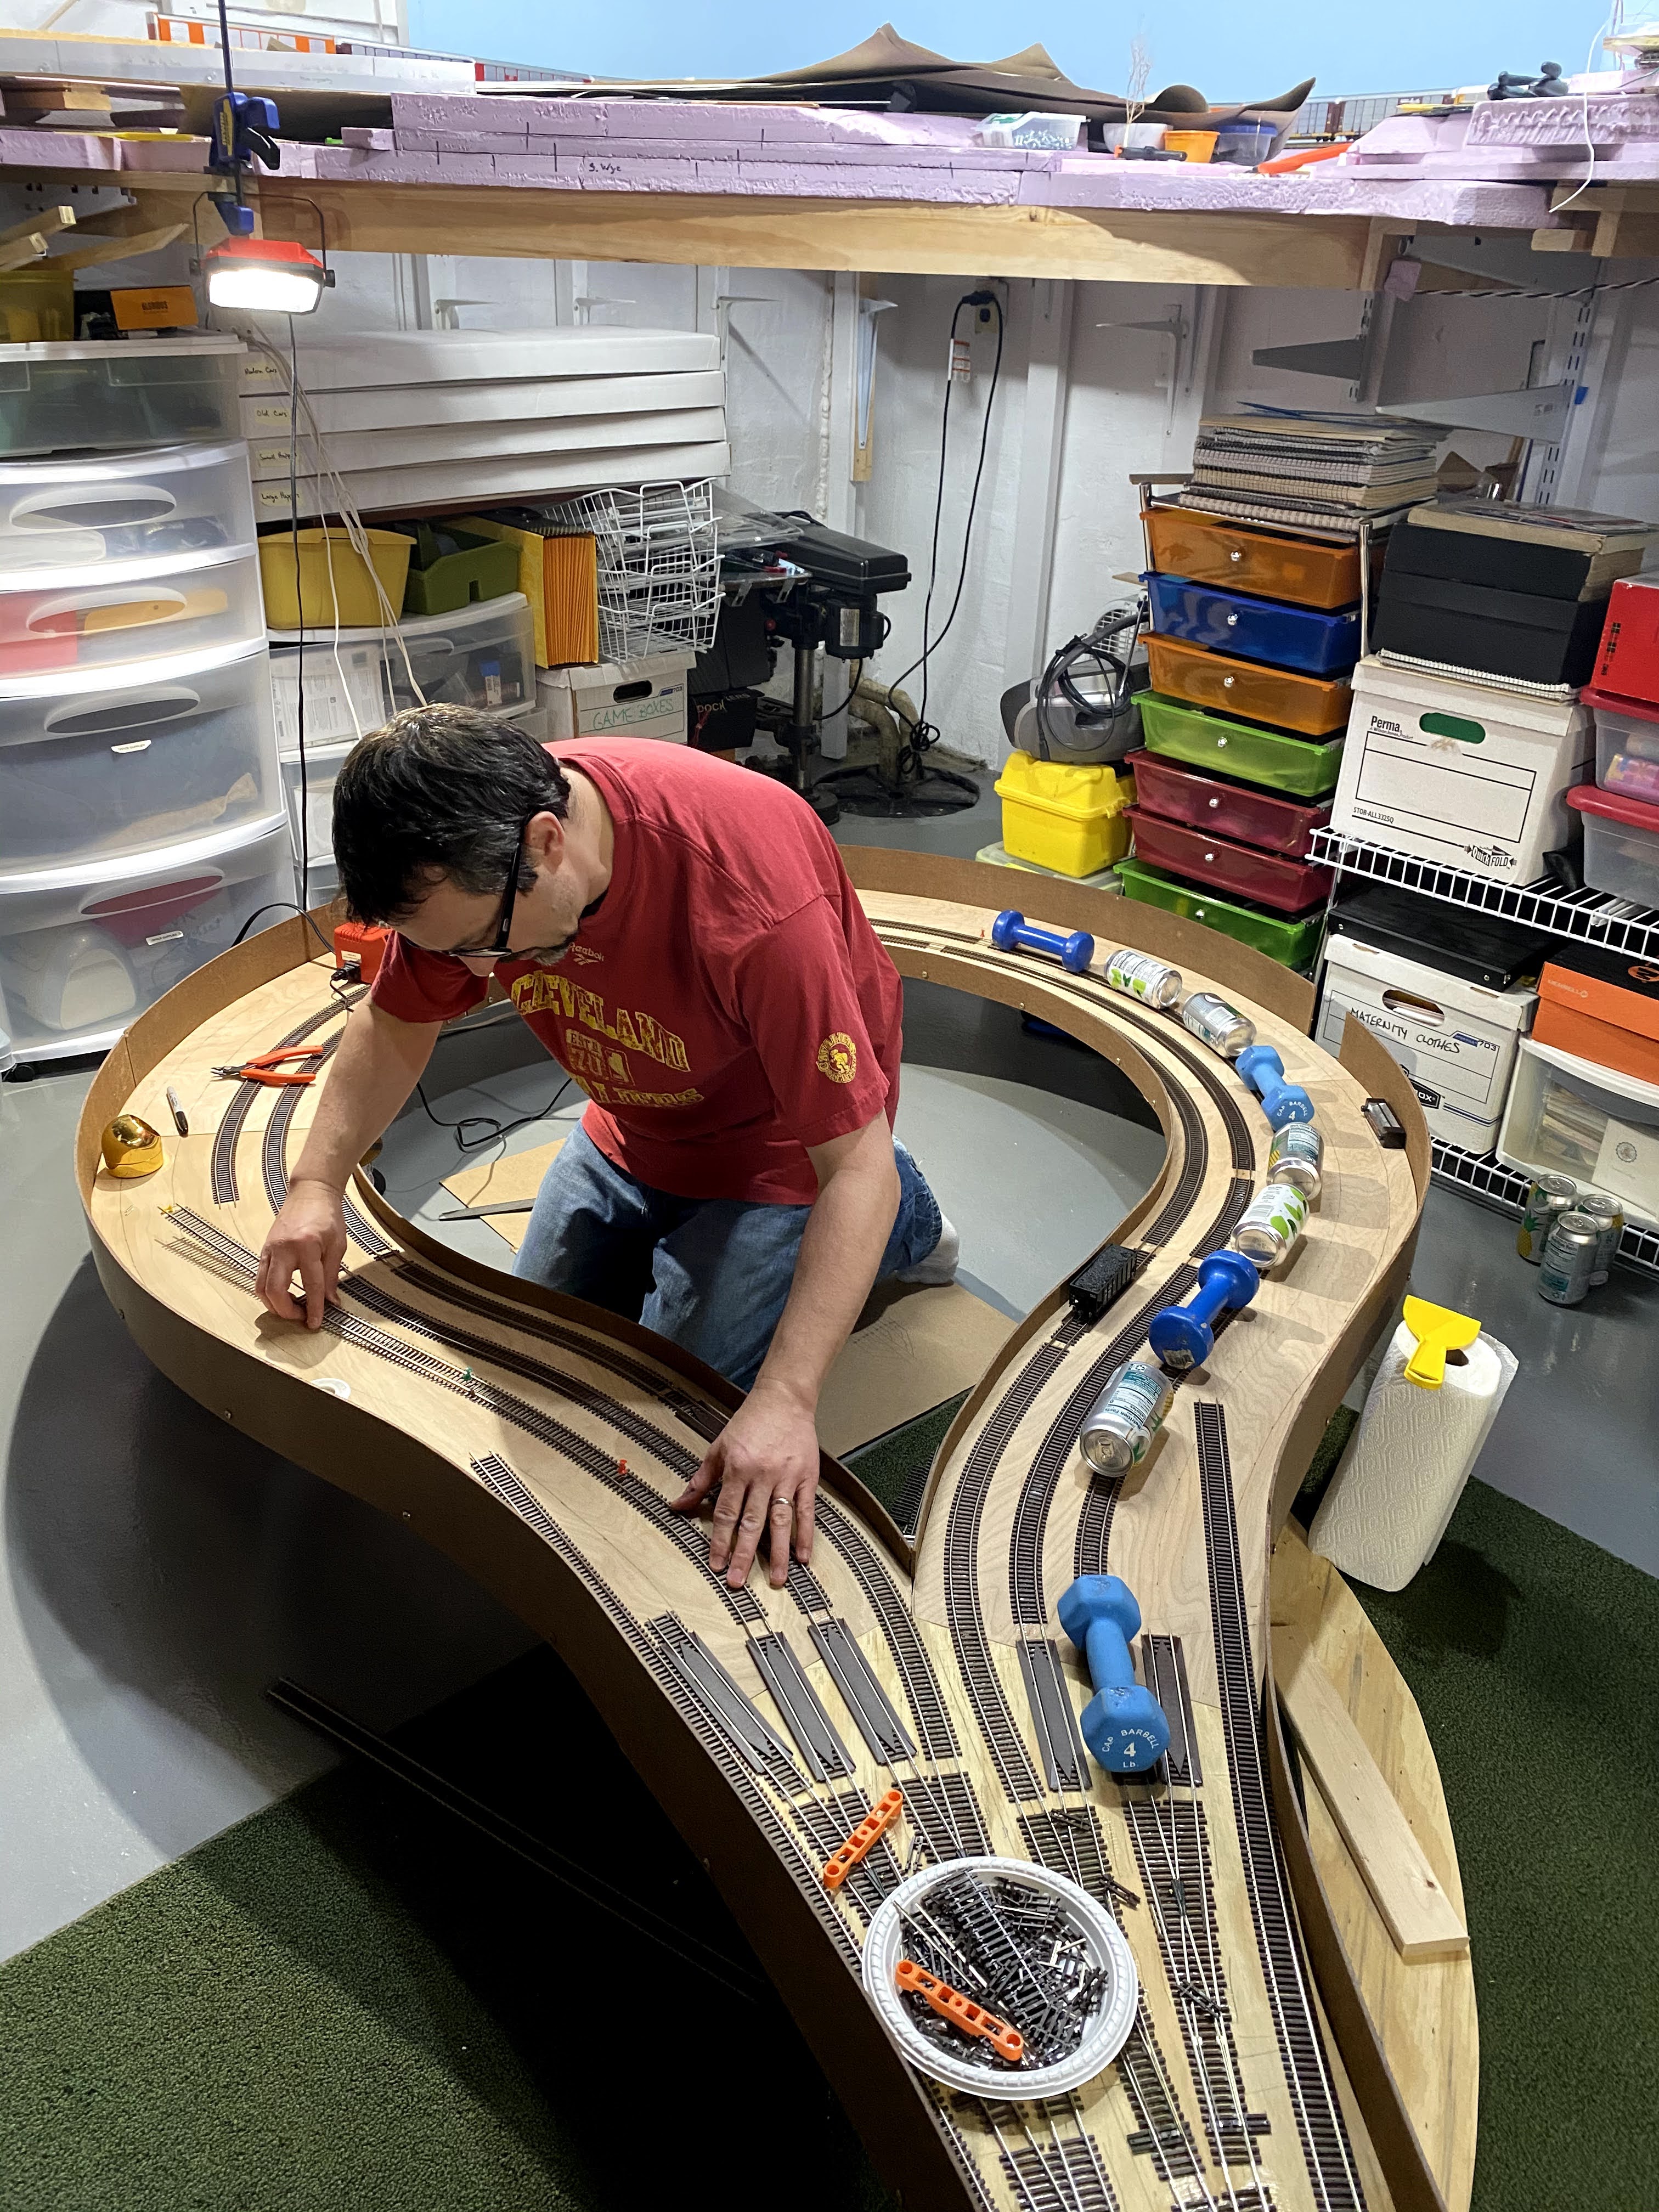
Below are photos of the track being laid and wiring of the feeders.

While the adhesive caulk sets up on one track with the weights on it, I start work on another.


Getting ready to solder feeders


Terminal block for independent power control to the staging tracks


Finished and ready to be lifted into place

Stay tuned for more.


Tuesday, January 31, 2017

Construction Report: January 31, 2017

Not a whole lot to report this week, I've reached the point with the benchwork at Pine Valley Yard where I can start laying foam.


I had a couple of ideas to use structures on either side of each stair frame opening to help take the eye off the fact the yard essentially goes through a large wide tunnel. In order to make this idea work the layout needed to surround the corner stair frame. So I cut a couple lengths of 1x2s to help support the foam and began measuring and cutting foam to fit the space. I also attached the end plate for the permanent section.


I won't glue the foam down just yet, it has been easier to line up the foam pieces on the floor to plan the track layout due to the stair "tunnel". FYI, there will be no turnouts under the stairs, that would just invite trouble. If you haven't read Chris Adam's "The Valley Local" blog through my links of favorite blogs at the left, then at least read "Weekend Working through the Punch List". That post has made me reevaluate certain design aspects of my layout for sure!

I also took a moment to finally glue down the foam panel for the east end of Adena Yard.


Next up is taking the foam around the corner and behind the furnace to link up with the "over the washer/water heater" section.

Monday, January 23, 2017

Construction Report: January 22, 2017 Redux

In the comments for yesterday's Construction Report , Jeff questioned the access to the lower right panel screw for the Breaker Box. That section of the benchwork was attached in a slightly different position than it was built for and did not clear the fuse box as designed. Since I could still open the panel door I thought nothing of it. However after reading Jeff's comments I double checked access to the screw and found that while "I" could get to it, I'm not sure an Electrician could or more importantly would want to.

I don't relish the idea of undoing any part of the layout but this had to be done should we ever need an electrician to open up the breaker box.

Don't worry, I did not saw while holding my phone, I took this to show Jeff what trouble he caused. Actually I'm thankful he pointed it out.
The rebuild didn't take very long. I chopped off about 3 inches and screwed the end plate back on. Then I just had to find a larger piece of plywood from my stash leftover from demolishing the old shelving structures when prepping the basement for the layout. I was all done in course of an hour not counting dinner.

Fully clear
The old vs the New
Because the gap now measures 19 inches, I'll take a look at bracing the plywood somehow to prevent any future sagging.

In other construction news, yesterday I also started the "future" expansion section for an engine terminal for Pine Valley. I started now partly to help figure out the overall track layout of the permanent section where the Yard Office is located as seen in Wordless Wednesday #111.

Again a 1x4 wood structure and birch plywood end plates to mate with the permanent section comprise the basic construction. When finished it will be 6 feet long and around 40 inches deep at it's widest narrowing to 12 inches at the far end. I still need to add a box frame for where the Walthers 110' Turntable will go.

Benchwork and paper turntable for planning.
Here's a look at what the track layout might resemble.

Model Pine Valley Engine Terminal version 3 or 4?
Here's the prototype to help figure things out.

Prototype Pine Valley Engine Terminal circa 1947
Ambitious? Like other my other ideas for the layout probably, but I also plan to not be in a rush to build this part as it's not critical for operations at first. Then again I didn't think I would build any of it yet and here is a major chunk of it sitting on my basement floor.


Hopefully I can lay some foam down next on the permanent parts and maybe some legs for the engine terminal.

Saturday, January 21, 2017

Construction Report: January 21, 2017

I finished the removable section in front of the Fuse box yesterday. I needed to add two pieces of styrene to shim a bit of a sideways wiggle due to a bigger gap than expected with the triangular key pieces. Now it fits perfectly and is very stable. All this will be topped with the 1 1/2 pink foam I've been using. I'll probably use a hot knife to get a nice separation of the foam for the removable section. This way it will remain easy to lift out for when someone decides to use the George Foreman Grill and Toaster at the same time.

Photos below.


Monday, January 16, 2017

Construction Report: January 16, 2017

Progress continues under the stairs and around the corner on the benchwork for my version of Pine Valley Yard in Dillonvale, Ohio. Pine Valley will act as a open staging yard for two of the four timetable freights and as it did in real life the starting point for many of the mine runs in the area.

I plan to make a stand alone blog post about the role that Pine Valley Yard will have in layout operations and how it will be modeled. On to the benchwork photos.

Having the benchwork go under the stairs was not the most ideal situation but it gets me the room to hold at least three or four 9-10 foot long trains. There's no way I could have switches starting the yard behind the furnace for access reasons so the run had to be extended.


This was one of of those building phases I probably spent too much time thinking about the best way to proceed. I originally wanted the benchwork to fully attach to the wall but the stairwell framing and stack pipe made that difficult without designing an overly complex 1x4 box frame. Before becoming overwhelmed with decision paralysis I went with the simplest solution, another simple rectangular 20" wide 1x4 box but with one end a little longer to attach to the rest of the benchwork with a cleat. A  small 1x2 block that can be seen below the phone and to the left, keeps things square to the attachment point under the stairs.

Speaking of which there are only three attachment points for this section as seen below. I was originally concerned but the section turned out to be very strong. I'm sure the large metal shelf bracket helps a lot.


I still need to cut a nice piece of birch plywood for the end plate and a matching piece for the future expansion  As I mentioned in my previous Construction Report, I would still like to expand this area with a removable engine terminal module for operating sessions (or until my wife says "Get that thing out of my path to the laundry"). Part of me feels like I might just build the module now while I'm on a roll.

Here's another look at a quick mock up, this time on the completed benchwork.


I think I'll angle the scene out of the curve (somewhat like seen above) so the yard ladder closes along the layout edge (bottom right and probably on the removable section). This will open up more space for the engine terminal. Thanks to Mark Flood for the idea, he drew his track layout for Minster, Ohio at an angle to include more buildings while designing a modular NKP Minster Branch.

Sunday, January 8, 2017

Construction Report: January 8, 2017

After my December update the work on remodeling the bathroom was pushed back until after the holidays. In the meantime however I'm warming up my construction skills by building more benchwork for the layout.

I knew the difficult parts of the layout to build would be the sections that run over the laundry area and another part that will run behind the furnace. Each section needed a part or all of it to be removed for maintenance reasons. The washing machine/water heater section that represents east of Adena to Long Run Tunnel was completed in Construction Report: September 3, 2016.

The west portal of the Long Run Tunnel will be a bit left of the various vent ducts as seen below. Everything beyond begins the next section of benchwork. This area will be "hidden" as it goes behind the furnace.


This section from Long Run Tunnel runs to a "open" staging yard which will also double as a very abbreviated representation of Pine Valley Yard at Dillonvale. Due to a combination of the narrow space and the overhead duct work I switched to a traditional 1x4 open grid style construction instead of my wall studs and shelf brackets benchwork method. I feel by the time I'm done I will have used just about every possible construction method on this layout!

The furnace section will have the mainline running downgrade so the Pine Valley Yard/staging can clear the framework of the basement stairs. Coming off the mainline after the tunnel portal will be a diverging route that will run upgrade to meet with the far other end of the mainline as a continuous run track. To achieve both I needed to use risers hence the open grid benchwork.

I made the section directly behind the furnace in two pieces so one section can be removed to perform maintenance on the humidifier. The removable section is bolted to a bracket on one side and the rest of the benchwork on the other. We only run it in the winter so it will be a few years before I have to access the humidifier.

Here's the completed section before installation.


Here is is installed and connected to the benchwork along the back wall. As you can see the Humidifier creates a brief narrow 7 inch space between it and the wall, plenty of room for 2 tracks.


Along the back wall is where Pine Valley Yard/Staging will begin. Here I continued the open grid benchwork due the need for another removable section, this time for fuse box access.

The dark colored wood to the left is not support for the benchwork but just a headboard for a bed in storage.
On the other side the benchwork continues through an odd shelf built into the stairs. The fuse box gap will be filled with an easily removable plywood section.

Under the stairs and around the corner. SPAX screws are awesome by the way.


Before I could build the the final section the weather turned bitterly cold making it no fun to cut wood in the garage, but here's an idea of what I hope to accomplish.

A crude mock up of the engine staging scene with the Pine Valley Yard Office. The little wood shelf still needs to be removed.
The end of the staging yard will also function as the starting point for all of the mine runs. Just like at the real Pine Valley, each mine job will be staged at the Yard Office waiting for their turn to head out. I don't need a whole lot of staging tracks as research has shown the mine runs didn't return with much, leaving a vast majority of the coal in Adena.

I'll build this last part with the thought to expand in the future by adding a proper engine facility. For now this arrangement will serve the immediate needs of the layout.

Wednesday, January 4, 2017

Sunday, September 4, 2016

Construction Report: September 3, 2016, Coming Around the Corner

In Wordless Wednesday #91 I showed a bit of the west end of Adena as I tested my planned full train size (about 9 feet long, engine through caboose). Aside from laying down a temporary 25 foot mainline for testing and just to run some trains, most of my latest work actually involves the other end of Adena.

In order to fit the Adena yard into my space the east end of the yard ladder will curve the wrong way compared to the prototype. As you can see in the below photo the yard ladder practically starts at the bridge over the Short Creek and then curves right. My yard will unfortunately curve left here but that's just sometimes a fact of compromise when building a prototype based layout.

820 pulls a westbound coal drag over the Short Creek and into Adena yard.
This is one of only two photos I know of that show this end of the yard in action. The other is on the back cover of the April 1950 NKP Company Magazine showing a 2-6-6-2 in the same view but with much better detail. One of these days I'll get myself a copy.

To preserve the bridge being as straight as it's prototype I designed a section of benchwork that carries it above the dryer and water heater. This piece of benchwork had to be strong and removable to access the water heater if necessary, so I built it out of 3/4" plywood instead of my usual foam base.


At this point I'm sure some of you will be quick to point out I should not be building something that close to my Water Heater's exhaust flue, and you're right. In my quest to try and keep bridges and whatnot as prototypical as possible I felt building across the top of my Water Heater would be ok. Once I had this piece built and in place I immediately felt extremely uncomfortable about it and took it down.

For the last month I wrestled with how to re-approach this section, keep it and just remove it when the layout wasn't in use or do a full redesign? Knowing that my son would want to run trains when I wasn't around to help get this section back in place, I opted for the full redesign.

Compromise once again appeared and I decided to curve the bridge somewhat to get around the Water Heater. The plan here is after exiting Adena Yard and crossing the Short Creek the mainline will disappear into Long Run Tunnel and head into a staging yard representing all points east (Pine Valley Yard, Mingo Junction, and Martins Ferry). The small yard at Herrick in between Adena and Dillonvale is another victim of compromise, hence the run straight to Long Run Tunnel. As seen below, I used cardboard to mockup a new safer design.

Cardboard mockup with a slightly curved bridge.
Cardboard mockup in place.

The new design will allow me to sleep at night as it now swings around the Water Heater altogether and avoids the potentially hot areas of the Water Heater.

I still needed this section to be removable so I stuck with the same construction methods as before but this time I used some Birch plywood for added stability. The cardboard mockup ended up being sacrificed as a cutting template.


Much better, plenty of space and available airflow.
I'm real happy with how the construction turned out and it's a redesign I can totally live with. This was a good lesson to learn and I feel sharing a mistake in planning is a huge part in sharing my overall progress on this blog. Even though this won't be a perfect representation of the scene I wanted to recreate in the photo, I still can't wait to see it come to life.