Showing posts with label Trackwork. Show all posts

Thursday, June 27, 2024

Rebuilding a Better Pine Valley Yard: Part 3 - Freight House Spur

Track work continues on the east end of Pine Valley with the spur to the Freight House up next to get finished 

In real life this spur was almost 1000 feet long and ended at the former W&LE Freight House on Main St. In my model version the spur is almost 3 feet long and can hold three 40' boxcars while the removable section is in place. Below are photos of the spur and freight house.

1920's view of east Dillonvale, the station, freight house and mill are all in view. Scanned from the CSU W&LE Collection.

Here's a close up of the freight house and the mill in the background.

1973 Freight House view from the NKPHTS Archives.

As a side note here, if you haven't visited the Nickel Plate Road Historical Society website in a while, there is a new Archive section that is well worth the visit. Thousands of images can now be browsed revealing a wealth of W&LE and NKP history! Here's the link https://archive.nkphts.org/index.php/

The turnout for the freight house spur is located on the removable section which I laid down in part 2 of this series. In the photos the spur track is lower than the mainline so I wanted to make a ramp down from the turnout roadbed. I achieved this with a milled homoasote ramp I purchased from a company that is unfortunately now defunct.

Homasote ramp

The homasote ramp wasn't quite long enough, so I had to continue the ramp with some styrene shims. I laminated sections of .020 and .040 styrene and then sanded the entire ramp with a small mouse sander to make a smooth transition.

Styrene ramp transition.
To give the impression of buried track next to the freight house, I scraped out about a 1/8 of an inch of the pink foam with a rasp tool.
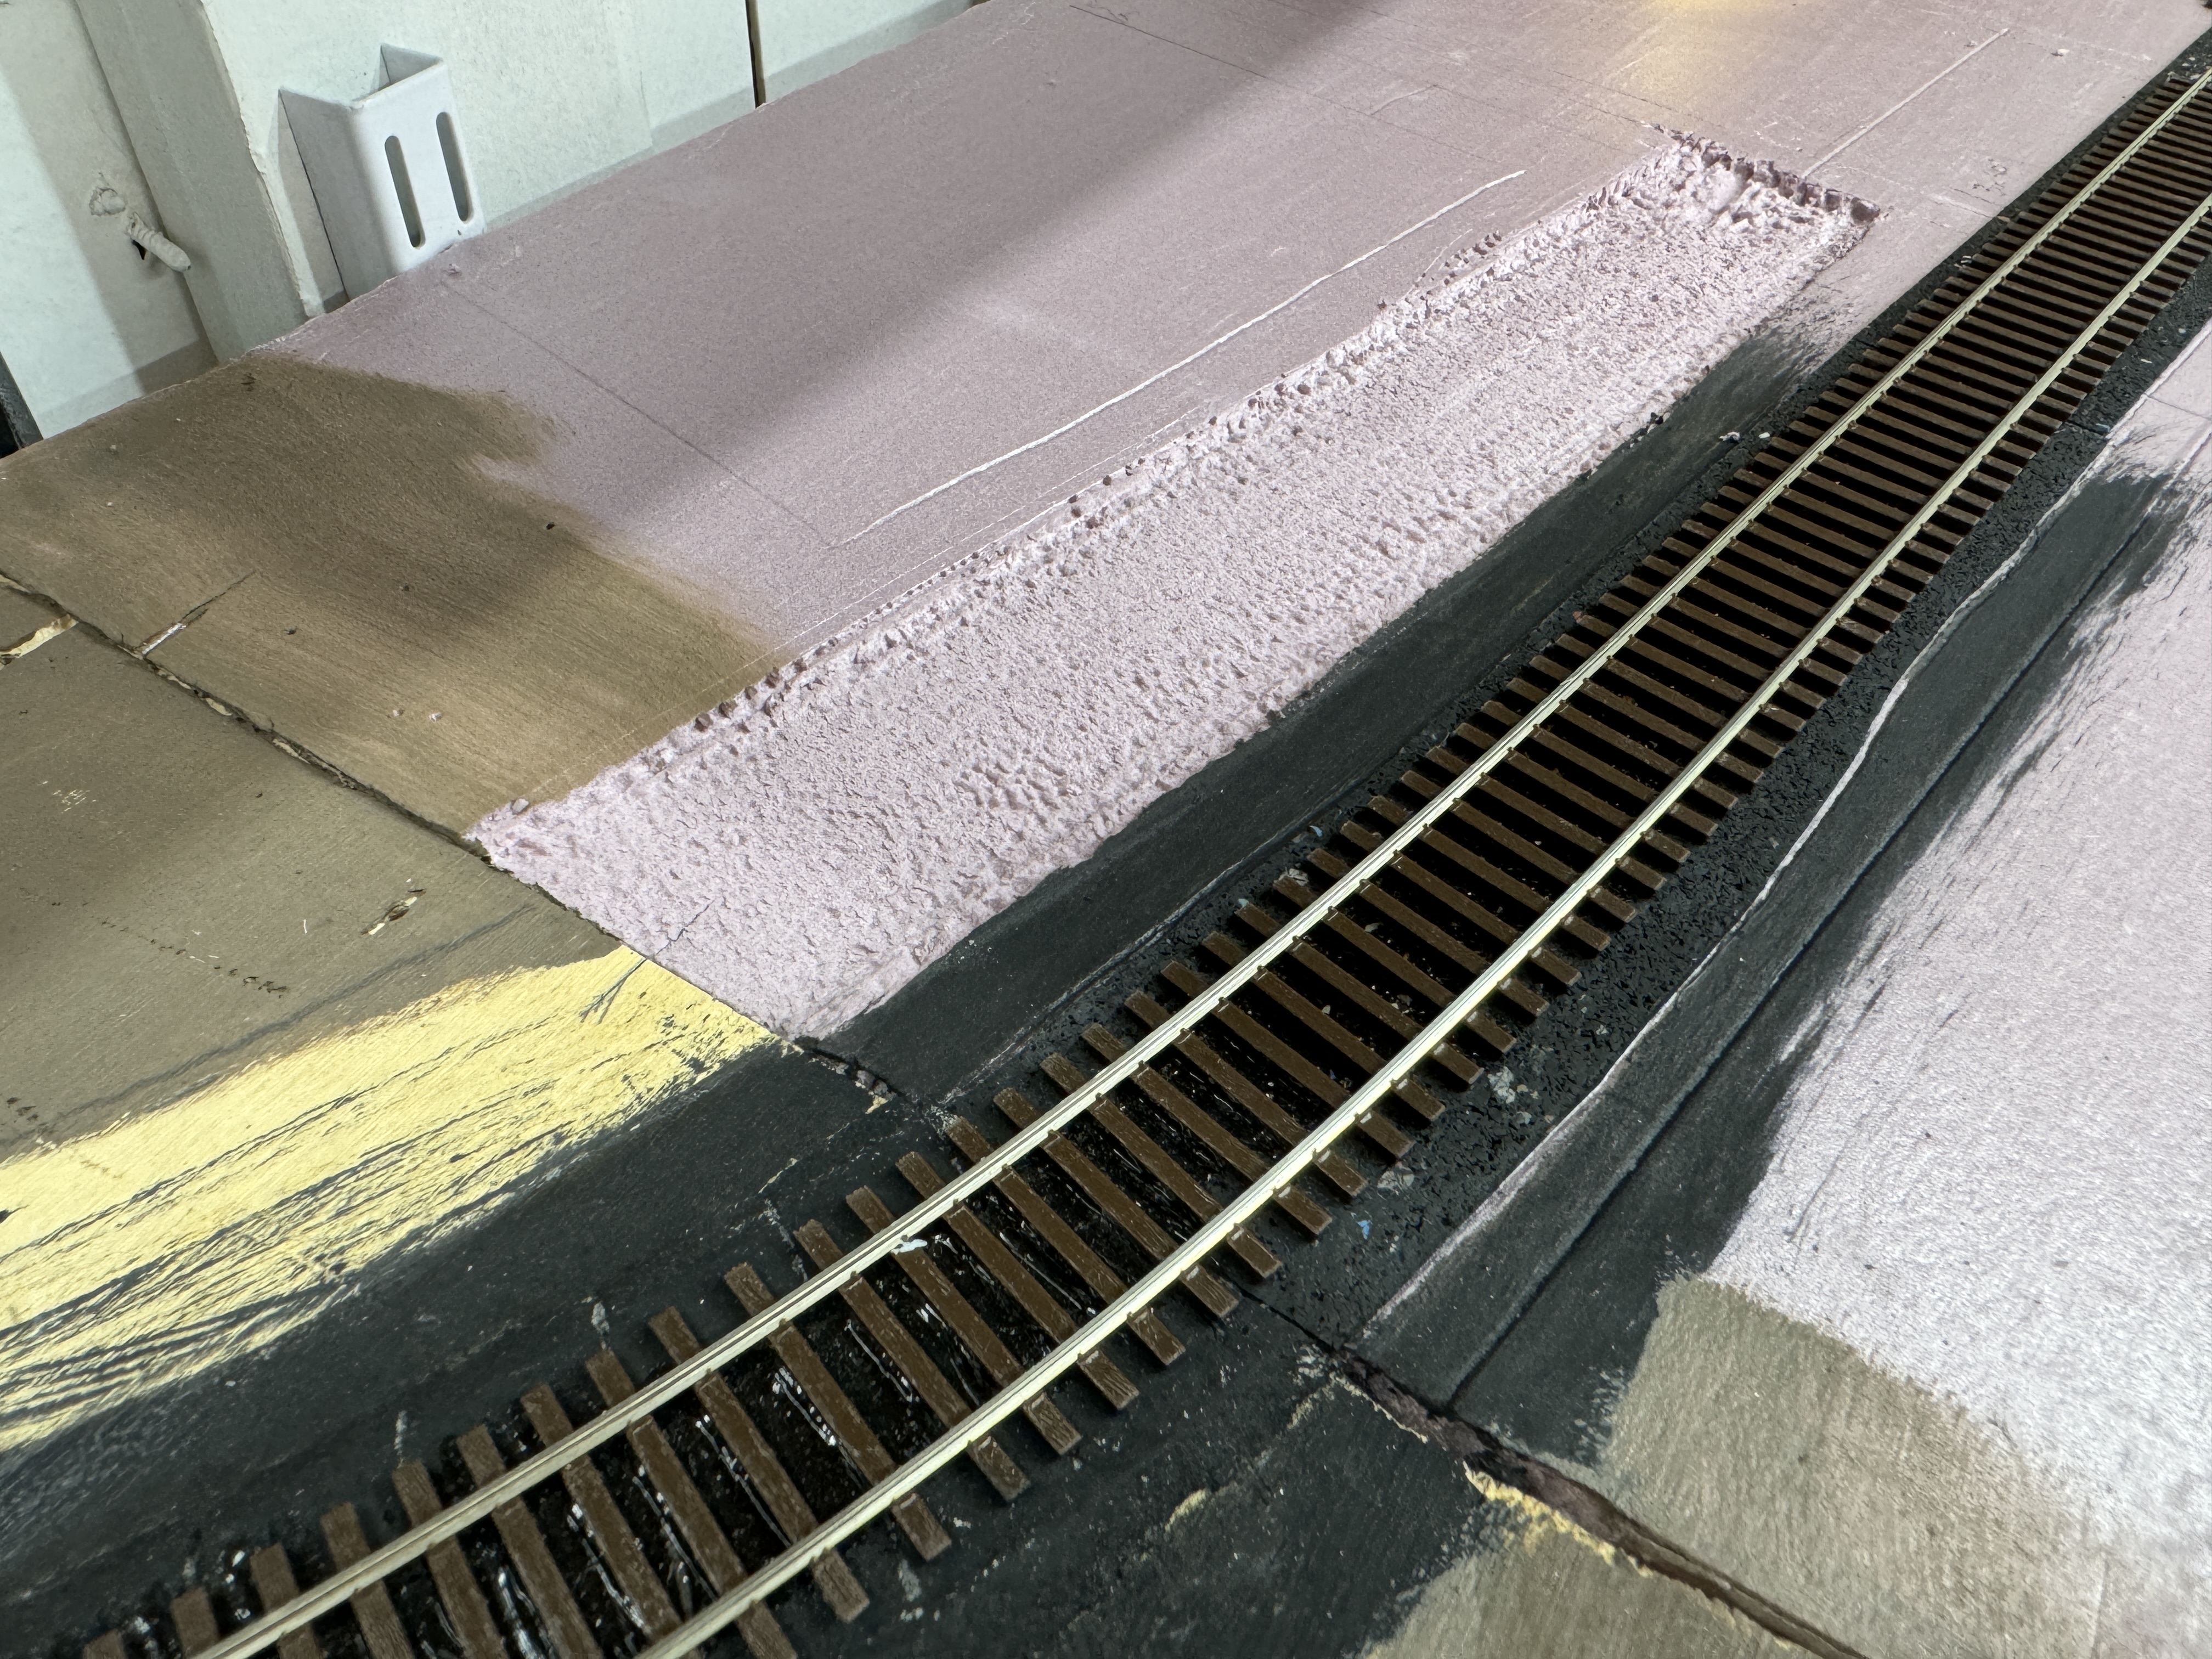
"buried track" slot

After the adhesive caulking dried, I painted the new track bed with black acrylics.

Painted and ready for track.


Once that paint was dry I glued down the spur tack with my trusty DAP adhesive caulk and soldered copper ties to the rails crossing the section joint just like the mainline. Then I cut the joint with my Dremel cut off wheel.

Unfortunately I don't have a model of the W&LE style freight house or even a mockup to use yet. I haven't found the actual dimensions of the former freight house or been able to get consistent guesses from the photos I have. However, since the space allotted for it will be tight with a backdrop in place, it will have to be built to fit no matter what the real dimensions were.

So for now the storage building that comes with the Walthers Grain Mill kit will do as a stand in.

Here's the Dillonvale Freight House scene for now with a couple of cars awaiting unloading.

Freight House scene for now


Friday, June 21, 2024

Rebuilding a Better Pine Valley Yard: Part 2

Work on the new Pine Valley Yard continues with trackwork on the curved removable section. I super elevate mainline curves using .040 styrene and .020 pieces on 6-8 inch long transition sections on both ends of the curve. I use DAP adhesive caulk for gluing the styrene shims to the track before installation.

Before gluing the track down with the same DAP adhesive caulk, I sanded the roadbed level with my small handheld sander. Then I painted the homasote roadbed with black acrylics and everywhere else with brownish "discount oops mix" latex paint from Home Depot. The roadbed then got one more sanding for good measure.

Seen in the below photos is a Shinohara #7 curved switch for the Dillonvale Freight House track. I replaced the throwbar with a copper circuit board tie and prewired the frog. This switch will be controlled with a Blue Point Manual Turnout Controller. 

Styrene pieces for super elevation

Sanded, painted then sanded again.

Copper circuit board ties were used at each end of the removable section to prevent the track from zippering off the plastic ties by accident when the section is open. Once the track was glued down I soldered the rails to the ties then cut the gaps with my Dremel cutoff wheel. 

Track work completed on the removable section.

The Dillonvale end of the removable section had a long diagonal cut that worried me but worked out ok except for one small piece of copper tie I had to glue back down. I'll revisit this removable section later and add a styrene sheet backdrop and a short facia.

Angled gap.

When I start a multi track area, I've always preferred to plan with pen and paper then move to full size mockups with tracing paper or brown wrapping paper and pieces of track. Here's that practice put to work designing the turnout arrangements around the yard office area.

Yard Office track work mockups

Once I'm happy with the track layout, I transfer it to the tracing paper then cut out enough of the tracing paper to use also use it as a template for the roadbed.

Like elsewhere in other yard or multi track areas on my layout, I use a 1/8" black rubber sheet material to help dampen the wheel noise that pink foam boards tends to amplify. I know nothing beats the quiet of plywood and homasote/cork but insulating foamboard is so much easier to handle and cut, especially by yourself.

I transfer the tracing paper template to the rubber sheet by outlining it with a white colored pencil and simply cut the sheeting with large sewing type scissors.

Below shows the rubber roadbed glued down with DAP adhesive silicone caulk and the beginnings of the yard turnouts just west of Main St.

West end of Pine Valley Yard in Dillonvale.

So far I couldn't be happier the way this is turning out. The track plan nearly matches the prototype yard layout as it existed in the mid 1950's and I'm making good progress.


Friday, April 12, 2019

Track work for Adena - Part 5

The wye track at Adena was the busy junction of the Adena RR branchline and the Toledo mainline. The Adena wye is also what I would consider part of a "signature" scene for my layout along with the west end of Adena Yard. So the challenge as usual, is to get the look as close to the prototype that I can in the space I have to work with.

NKP 941, a 2-6-6-2 mallet, on the start of the wye and the Adena RR branch. JJ Young JR photo
Highlighted in red on the valuation map below shows the track I'll be working on next.  Click on the valuation map to see a larger version.

Tracks added in this blog post 4-9-19, Valuation Map from RailsandTrails.com
Aside from laying track I'll also have a lot of bridges to build. The wye itself contains two bridges, one through girder on the main and a large 12 span curved wood trestle bridge at the start of the Adena RR branch. Between the wye and the Adena Tunnel on the main line there were two through girder bridges. Due to space constraints I'll only model the more interesting bridge closest to the tunnel with the Short Creek and a road running under it. Finally just past the wye on the Adena RR branch there are two bridges to build, one wood trestle and deck plate girder combo over the Short Creek and a through plate girder over W. Main St.

Here's photos of the bridges that will be built on the west end of Adena.

Toledo Mainline BR 192.13 over the Short Creek and Blairmont Rd. not too far away to the left is the Adena Tunnel. 4-9-2014 Chris Ellis photo
Toledo Mainline BR 192.67 over the Short Creek inside the Adena wye. 4-9-2014 Chris Ellis photo

Adena Branch BR 0.20 over the Short Creek inside the Adena wye, JJ Young photo flickr.com.

Adena Branch BR 0.40 over the Short Creek. 4-9-2014 Chris Ellis photo

Adena Branch BR 0.60 over W. Main St. Google Maps
Building those will keep me busy, but first I'll need to begin laying the road bed and some of the track to know where these bridges will go exactly.

Here's where the wye at Adena stands before trackwork. A while back I started the through girder bridge 192.67 and it's masonry footings which can be seen in the below picture. You can pretty much only make out two sides of the wye, but all the lines are laid out.

Adena wye looking east toward the yard before the real track work begins.
Adena wye looking west.


The cork road bed is now in place leading up to Bridge 192.67. A layer of the rubber sheet material I like to use and HO scale cork roadbed brings it level with the stone bridge abutments.

Toledo Mainline BR 192.67
The cork/rubber roadbed combo also brings it level with the milled homosote roadbed I planned on using. A difference in foam panel material caused a height problem but the two kinds of roadbed solved that issue. A little lightweight spackle also smooths out a low spot on the main and the seam on the west wye leg as seen below.

Spackle fill out a low spot on the main and a seam transition on the wye.

Mainline part of the wye
For the rest of the roadbed I use Cascade Rail Supply's milled homasote branch profile roadbed. All the roadbed whether it be cork, rubber or homasote is glued down with the DAP clear adhesive caulk.

The homasote roadbed goes in for the west end of the wye
Homasote roadbed cut for the west end turnout.


The west end of the Adena wye is anchored with a #8 curved 32"/25" radius turnout. I built this one freehand with a paper template before I received my Fast Tracks fixture. In order to fit the yard and wye along one wall I had to curve the west end of the wye. I was able to keep the 30" mainline radius on the outside but had to drop down to 24" for the inside of the wye. This brought the turnout pretty close to the backdrop which should make scenery there interesting.
.
The turnout ready to be spiked down after the headstock ties get glued in.
After the west end of the wye was "laid in stone" I began laying the other two legs of the wye which mark the beginning of the Adena RR branchline. The track being held up by a small container on the right will be where the long curved trestle bridge (BR 0.20) is located.

The beginnings of the Adena Branch
Next up more track laying and construction of the benchwork for the other two Adena Branch bridges.

- Quick links

Track work for Adena - Part 1
Track work for Adena - Part 2
Track work for Adena - Part 3
Track work for Adena - Part 4
Track work for Adena - Part 5


Friday, March 29, 2019

Track work for Adena - Part 4

In this session I'll wrap up construction of Adena Yard with the the two final yard tracks and the spur for the Adena Mill and team track. I've added a track diagram from the W&LE Valuation maps so everybody knows what is what in these blog posts. Red marks the tracks added.

Click on this sentence for the valuation maps for the entire W&LE at Rails and Trails's website.

Tracks added in this blog post 3-21-19, Valuation Map from RailsandTrails.com

The last two shorter tracks south of the main need their west end turnouts and track laid. Here you can see the marks made with a silver sharpie to help position the tie strips and the turnouts once the adhesive caulk is spread. You can also see an invasion of my Son's modern equipment in the yard which I'm sure will cause some kind of time dimension paradox.


Below you can see the turnouts are now spiked down with the other yard tracks in place and connected to the turnouts.


While testing the two new turnouts I was concerned that particularly bad derailment could cause a quick trip to the floor. So I cut a strip of Plexiglas to serve as a barrier not only to a derailment but also an errant elbow or laundry basket. This step also pointed out the need for a layout fascia.


Due to the volume of hoppers that Adena handled there was a small RIP (repair in place) track that serviced the yard. This track extended from the bottom turnout that I just installed. Since I'm not sure of the final positioning or length yet, I left the track loose and unpowered for now.

Adena Yard RIP Track
In this photo of W&LE 6805 in Adena Yard, the RIP track can be seen to the far right with what looks like a Pennsylvania H-21 hopper sitting all alone on it. The other track that disappears to the right is the lead for the team and mill tracks.That's a great photo of the yard as well, check out the old caboose or car body acting as the car repair shed. The white fencing and pole lights surrounds the Adena High School football field.

W&LE 6805 in Adena Yard
I added the mill and team tracks in the same way, I left them both loose but I powered the team track as engines were often put on that track in between assignments. The foot print of the Adena Mill is to scale from Google Maps measurements. Last I saw in 2016, it was one of the few track side structures still standing.

Adena team and mill tracks.
And with that all major track work in Adena Yard is complete! Next up I start work on the Adena wye.


- Quick links

Track work for Adena - Part 1
Track work for Adena - Part 2
Track work for Adena - Part 3
Track work for Adena - Part 4
Track work for Adena - Part 5

Monday, March 18, 2019

Track work for Adena - Part 3

With the west end turnouts all set I can begin work on the east end yard ladder. My goal is to place the first two mainline turnouts and then connect the main though Adena. Then I can lay the seven yard tracks building of the mainline route.

As you can see below, the valuation map of the west end of Adena yard is fairly straight with a gentle curve to the right after the bridge.
East end of Adena Yard. Cropped image from RailsandTrails.com

My version of the yard ladder had to be severely curved left in order to fit along the wall. To help with planning I mapped the ladder out with printable Fast Track templates on a large piece of poster board.


The first turnout is a #8 30"/40" radius which I had already hand built from a paper template. The other turnouts I needed were five #8 32"/25" radius and one #6. Since I knew I needed at least six #8 32"/25" turnouts (one for the Adena wye) I felt I might as well order a new fixture from Fast Tracks.

Fast Track's Curved #8 32"/25" radius turnout


With the fixture in hand I made quick work of making what I needed and started committing the paper template to my rubber roadbed. First up was the #8 40"/30" turnout which beings the main yard. I used a silver sharpie to mark the final position of the turnout and to aid in placing the wood ties. The black sharpie is for marking rail to be trimmed.


In the below photo the first two mainline turnouts on the east end are in place and the ties have been glued down.


With the eastern mainline turnouts in place it was time to lay the mainline to connect to the other end and establish the curves through the yard. The "Fruit Can Express", as my son calls it, has arrived in Adena to help glue down the main. 


With the main line down I started forming the yard tracks using the orange 3D printed track spacers to maintain a 2 inch spacing. The marks at the bottom of the below photo are the outside rail location for each yard track.


The "Fruit Can Express" parks on yard track 1 during gluing.


While waiting for the adhesive caulk to dry in between gluing sessions, I began soldering feeders on completed tracks. This way my eager helper could test finished tracks afterwards.


Below, more yard tracks getting spaced and ready for gluing. In all Adena yard is eight tracks wide. I'll also note that for the yard tracks I cut out every 6th or 7th tie and re spaced the ties to give the track more of a secondary look. I apparently had forgotten how much work this was and my thought not to do it again but I'm glad I did.


View from the east end of Adena Yard.


The east yard ladder is almost complete in this photo.


The last switch in the main yard ladder only needed to be a straight #6 since the curve was nearly complete at that point.


Here's the last turnout for the shorter two south tracks in place. I found a low spot which I filled with flexible spackle and then stained black with my tie wash.


Finally in the below photo all east yard turnouts are in place and stained. I even organized my construction mess a little bit for the picture. 
I'll lay the two shorter yard tracks on the right once I have their opposing turnouts installed. But will have to wait for the next part in this series.