 |
| Now with the support brackets in place around the corner I can start to figure out curved yard ladder mentioned in the Gas Meter Nuisance post. This may not be so bad after all. |
Wednesday, March 30, 2016
Wordless Wednesday #69

Friday, March 25, 2016
Gas Meter Nuicance
I know I've mentioned it before but it's worth repeating, I hate my gas meter. Well in better terms I'm displeased where it is located.
When I placed the Adena yard along the wall with the gas meter, I did so thinking the tracks would simply bump out around it. This differs from the prototype flow of the yard, but sticking to the real design went out the window when the yard had to curve around the corner to fit the east end.
I'm okay with design deviations of the east end because the real star of the show anyways was the west end of Adena with the wye, bridges, depot and other buildings.
The real problem the meter causes is combining the bump out back into a curve where the east yard ladder starts out of sight to the right of the photo. If the gas meter wasn't there this wouldn't be an issue of course.
The hoppers you see in the above photo barely fit under the meter. So I could go under the meter but I would have to rip out and alter all the benchwork in place to add more clearance for anything else like a boxcar or engine. That's not going to happen at this point. Plus I can't really make that level any lower as that would pinch more space from the lower deck and most importantly part of the laundry area.
I'll figure it out, but I might finally have to turn to a CAD program to do so.
I suppose every layout has at least one major obstacle to overcome. Whether that turns out to be a gas meter, furnace, water heater, chimney, support column or solid wall, something similar is present in almost every layout I've visited so far. Many people could check off that whole list when designing their track plan. Luckily? I only have half that list.
 |
| Revenge of the Gas Meter. |
 |
| At least the meter will be hidden with a thin backdrop that comes very close to the tracks. Yes that scenery is not the SE Ohio hills but the farmlands of NW Ohio, a leftover from my Bellevue modeling plans. |
I'm okay with design deviations of the east end because the real star of the show anyways was the west end of Adena with the wye, bridges, depot and other buildings.
The real problem the meter causes is combining the bump out back into a curve where the east yard ladder starts out of sight to the right of the photo. If the gas meter wasn't there this wouldn't be an issue of course.
The hoppers you see in the above photo barely fit under the meter. So I could go under the meter but I would have to rip out and alter all the benchwork in place to add more clearance for anything else like a boxcar or engine. That's not going to happen at this point. Plus I can't really make that level any lower as that would pinch more space from the lower deck and most importantly part of the laundry area.
I'll figure it out, but I might finally have to turn to a CAD program to do so.
I suppose every layout has at least one major obstacle to overcome. Whether that turns out to be a gas meter, furnace, water heater, chimney, support column or solid wall, something similar is present in almost every layout I've visited so far. Many people could check off that whole list when designing their track plan. Luckily? I only have half that list.
Wednesday, March 23, 2016
Wordless Wednesday #68
 |
| W&LE Boxcar 24228. I believe the reweigh date says 9-54, if so this is a neat example of an older Wheeling lettering style surviving into the 50's. |
Monday, March 21, 2016
Fast Tracks Turnout #1
A couple of years ago after an overtime filled holiday season, I decided to splurge and buy the #6 switch building kit from Fast Tracks. Fast forward to today with the layout quickly approaching a state where track can begin to be laid, I figured I should finally break out the kit and try it out.
Since purchasing the kit I've done my homework getting the right materials and information to make building the switches I'll need as easy as possible while I learn the methods.
I upgraded my horrible old Radio Shack soldering iron to a Weller WLC100 stand unit and immersed myself in handlaying track videos such as the Fast Track series on Youtube or Tony Koester lending a hand with the trackwork on Model Railroader's Winston-Salem Southbound project.
Only two things caught me off guard as I started; the need to run out and buy a new mill file as mine was old and no longer very sharp and my soldering flux had aged to the point I should go get a new bottle soon.
Otherwise everything went as smooth as I could've hoped. If you know anything about the Fast Track system then you probably saw that statement coming, but if you're like me and felt like handlaying track was some sort of Voodoo magic, give it a try. You might be pleasantly surprised at the results.
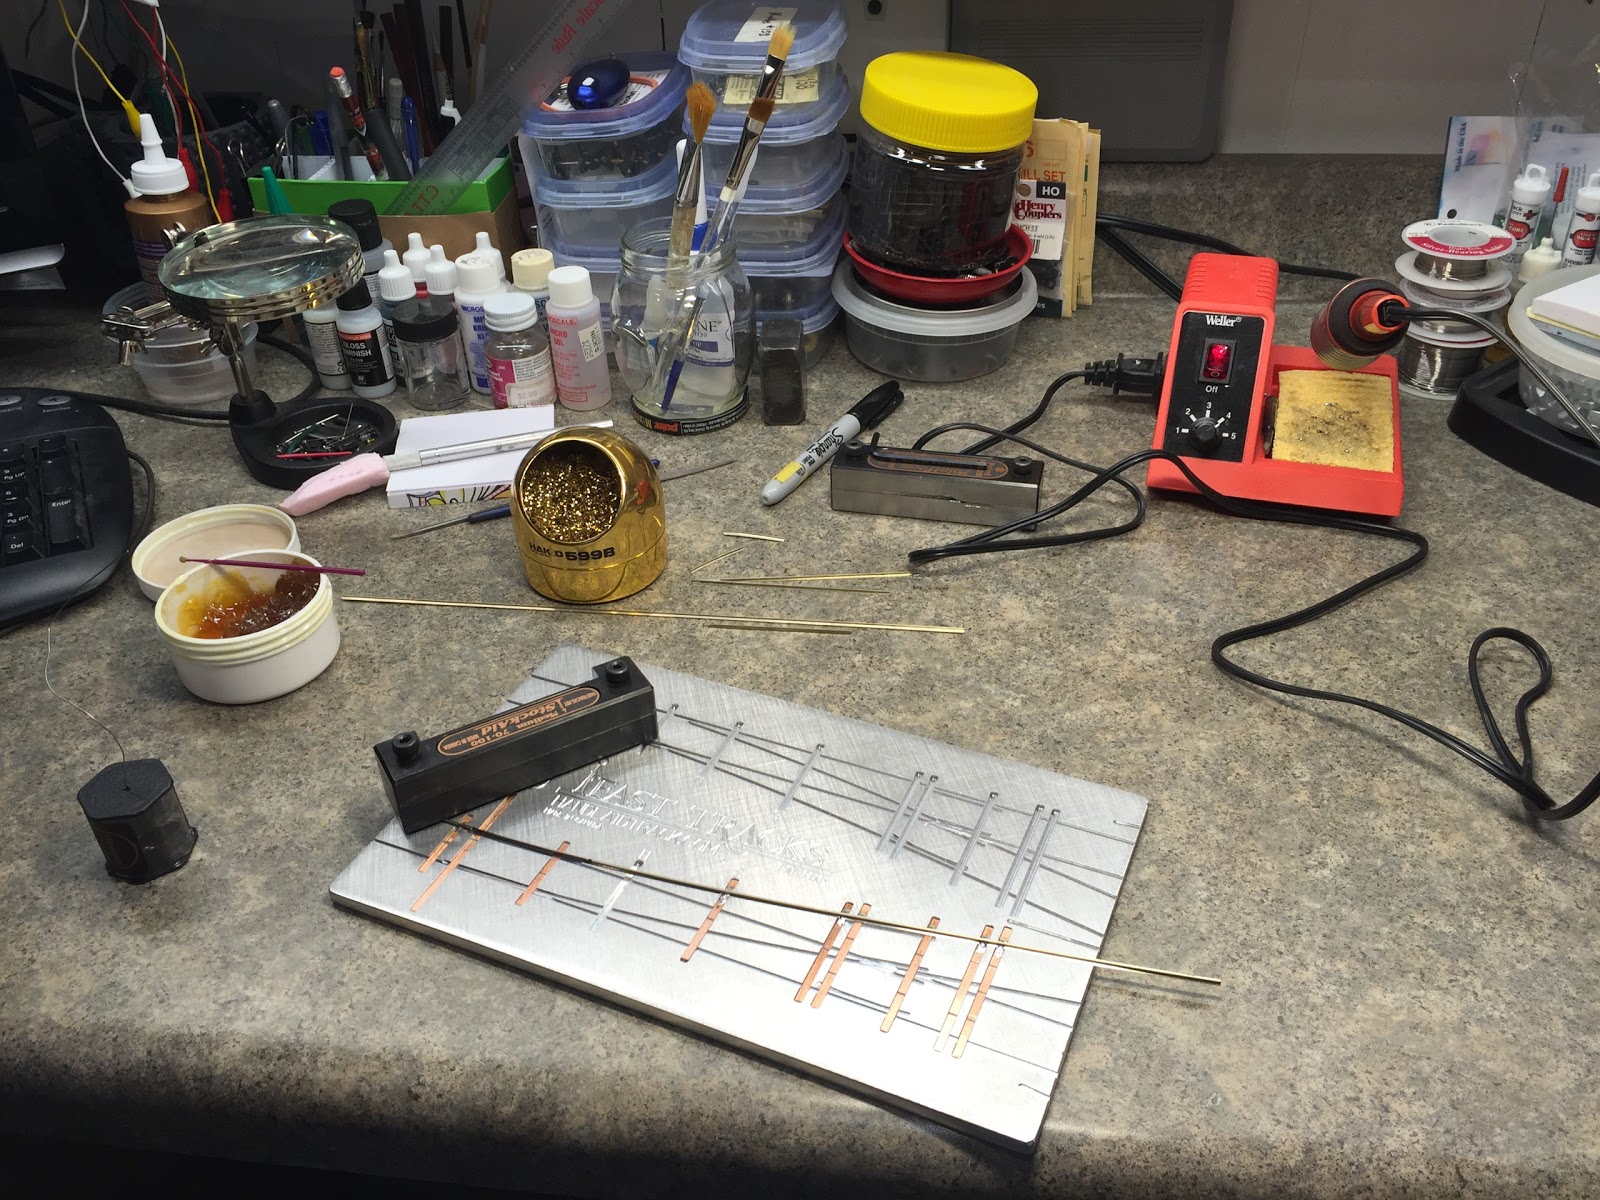 |
| Starting the first stock rail. |
 |
| Brendan capturing Dad concentrating intently on his work. |
 |
| Checking my work, rolls smooth! |
 |
| I figured my first one would be ugly enough for a hidden staging yard but it's not too bad. One down, probably another four dozen to go... |
Subscribe to:
Posts (Atom)