Showing posts with label Layout Construction. Show all posts

Thursday, August 29, 2024

A Quick Carpet Project

 After a few months building the new yard at Dillonvale, my aching feet and back realized the need for some cushioning from the hard concrete basement floor. I have a large area rug that covers most of the basement except for the new construction area.

I've read about other modelers using carpet squares for cheap, easy and replaceable basement carpeting. So I made a quick trip to the local Menards and found they had a small mountain of carpet tile "seconds" for a very reasonable price. The space I needed to fill was about 6" by 6" so I'd need nine of the 2" square tiles. Lucky for me I found nine matching tiles in a dark color I had in mind.

Carpet Tile seconds at Menards

Once back home I used some extra strips of no-skid drawer liners under the tiles to keep the carpet from sliding around. For roughly $25 this was a pretty small but nice upgrade to the train room and my feet will thank me for it!

Finished Carpet Tiles


Thursday, June 27, 2024

Rebuilding a Better Pine Valley Yard: Part 3 - Freight House Spur

Track work continues on the east end of Pine Valley with the spur to the Freight House up next to get finished 

In real life this spur was almost 1000 feet long and ended at the former W&LE Freight House on Main St. In my model version the spur is almost 3 feet long and can hold three 40' boxcars while the removable section is in place. Below are photos of the spur and freight house.

1920's view of east Dillonvale, the station, freight house and mill are all in view. Scanned from the CSU W&LE Collection.

Here's a close up of the freight house and the mill in the background.

1973 Freight House view from the NKPHTS Archives.

As a side note here, if you haven't visited the Nickel Plate Road Historical Society website in a while, there is a new Archive section that is well worth the visit. Thousands of images can now be browsed revealing a wealth of W&LE and NKP history! Here's the link https://archive.nkphts.org/index.php/

The turnout for the freight house spur is located on the removable section which I laid down in part 2 of this series. In the photos the spur track is lower than the mainline so I wanted to make a ramp down from the turnout roadbed. I achieved this with a milled homoasote ramp I purchased from a company that is unfortunately now defunct.

Homasote ramp

The homasote ramp wasn't quite long enough, so I had to continue the ramp with some styrene shims. I laminated sections of .020 and .040 styrene and then sanded the entire ramp with a small mouse sander to make a smooth transition.

Styrene ramp transition.
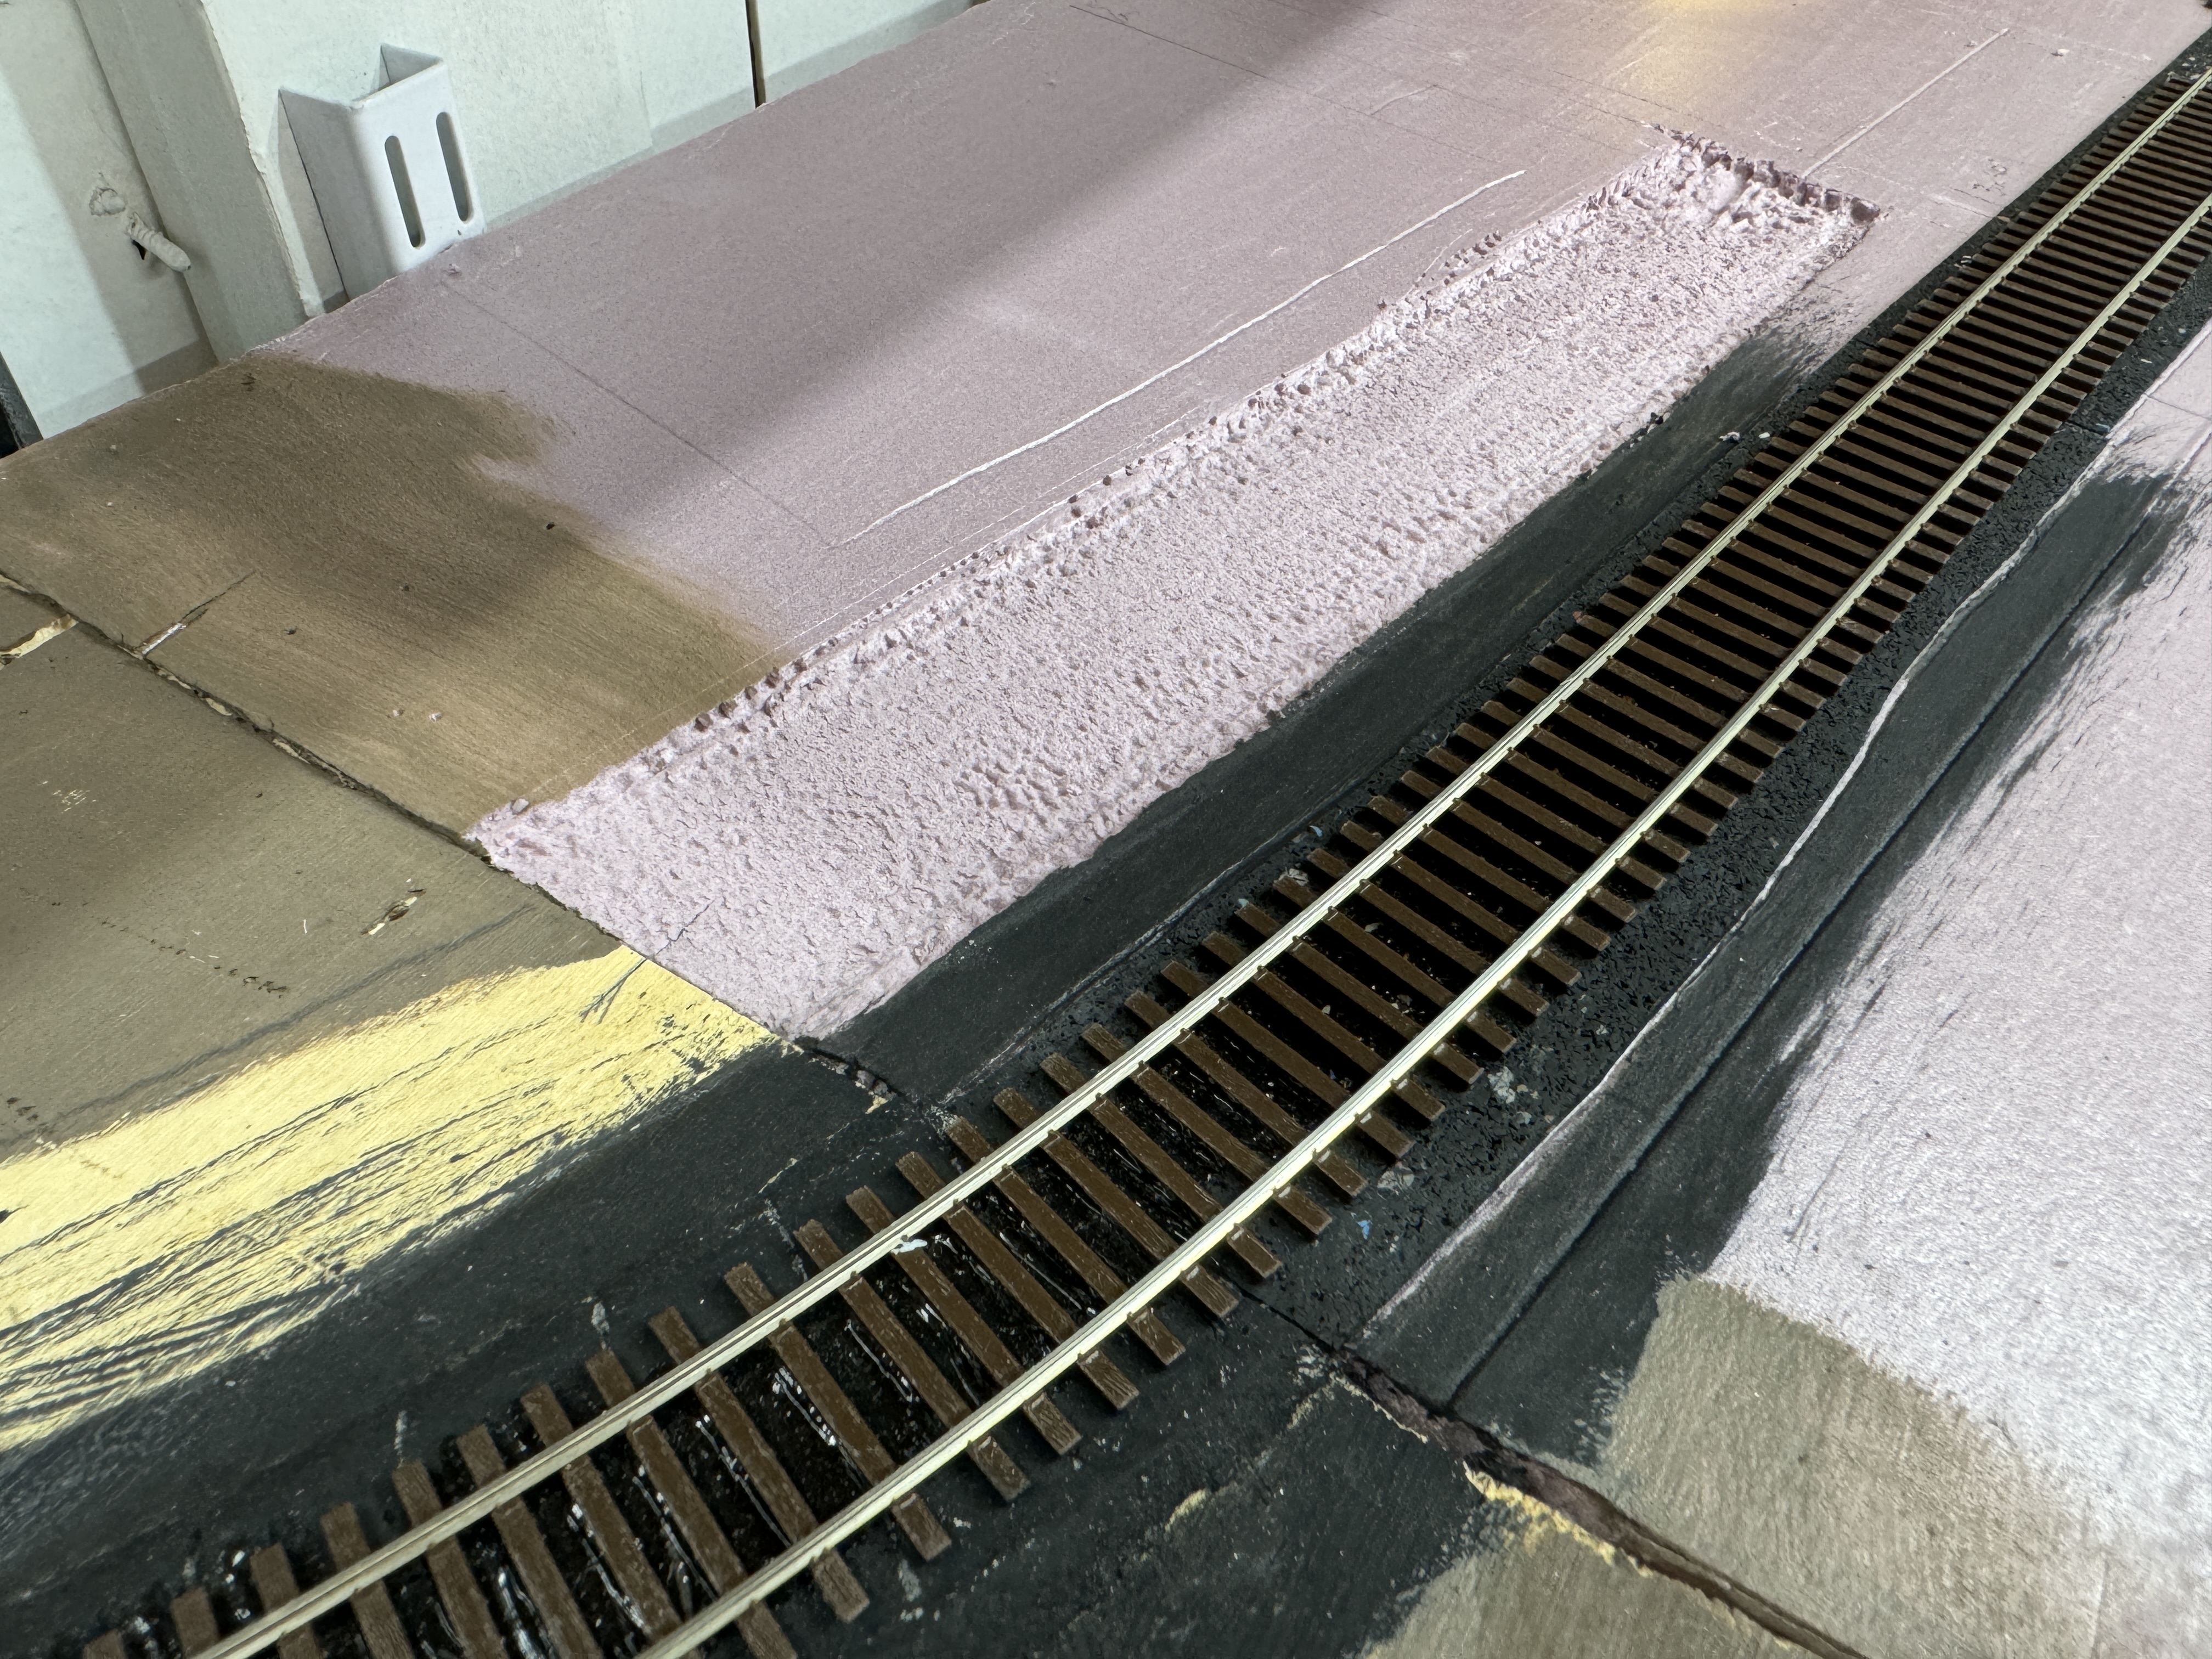
To give the impression of buried track next to the freight house, I scraped out about a 1/8 of an inch of the pink foam with a rasp tool.

"buried track" slot

After the adhesive caulking dried, I painted the new track bed with black acrylics.

Painted and ready for track.


Once that paint was dry I glued down the spur tack with my trusty DAP adhesive caulk and soldered copper ties to the rails crossing the section joint just like the mainline. Then I cut the joint with my Dremel cut off wheel.

Unfortunately I don't have a model of the W&LE style freight house or even a mockup to use yet. I haven't found the actual dimensions of the former freight house or been able to get consistent guesses from the photos I have. However, since the space allotted for it will be tight with a backdrop in place, it will have to be built to fit no matter what the real dimensions were.

So for now the storage building that comes with the Walthers Grain Mill kit will do as a stand in.

Here's the Dillonvale Freight House scene for now with a couple of cars awaiting unloading.

Freight House scene for now


Friday, June 21, 2024

Rebuilding a Better Pine Valley Yard: Part 2

Work on the new Pine Valley Yard continues with trackwork on the curved removable section. I super elevate mainline curves using .040 styrene and .020 pieces on 6-8 inch long transition sections on both ends of the curve. I use DAP adhesive caulk for gluing the styrene shims to the track before installation.

Before gluing the track down with the same DAP adhesive caulk, I sanded the roadbed level with my small handheld sander. Then I painted the homasote roadbed with black acrylics and everywhere else with brownish "discount oops mix" latex paint from Home Depot. The roadbed then got one more sanding for good measure.

Seen in the below photos is a Shinohara #7 curved switch for the Dillonvale Freight House track. I replaced the throwbar with a copper circuit board tie and prewired the frog. This switch will be controlled with a Blue Point Manual Turnout Controller. 

Styrene pieces for super elevation

Sanded, painted then sanded again.

Copper circuit board ties were used at each end of the removable section to prevent the track from zippering off the plastic ties by accident when the section is open. Once the track was glued down I soldered the rails to the ties then cut the gaps with my Dremel cutoff wheel. 

Track work completed on the removable section.

The Dillonvale end of the removable section had a long diagonal cut that worried me but worked out ok except for one small piece of copper tie I had to glue back down. I'll revisit this removable section later and add a styrene sheet backdrop and a short facia.

Angled gap.

When I start a multi track area, I've always preferred to plan with pen and paper then move to full size mockups with tracing paper or brown wrapping paper and pieces of track. Here's that practice put to work designing the turnout arrangements around the yard office area.

Yard Office track work mockups

Once I'm happy with the track layout, I transfer it to the tracing paper then cut out enough of the tracing paper to use also use it as a template for the roadbed.

Like elsewhere in other yard or multi track areas on my layout, I use a 1/8" black rubber sheet material to help dampen the wheel noise that pink foam boards tends to amplify. I know nothing beats the quiet of plywood and homasote/cork but insulating foamboard is so much easier to handle and cut, especially by yourself.

I transfer the tracing paper template to the rubber sheet by outlining it with a white colored pencil and simply cut the sheeting with large sewing type scissors.

Below shows the rubber roadbed glued down with DAP adhesive silicone caulk and the beginnings of the yard turnouts just west of Main St.

West end of Pine Valley Yard in Dillonvale.

So far I couldn't be happier the way this is turning out. The track plan nearly matches the prototype yard layout as it existed in the mid 1950's and I'm making good progress.


Wednesday, June 12, 2024

Update 2024 - Rebuilding a Better Pine Valley Yard: Part 1

It's been a while since an update to say the least, 2021? Wow!  I think we all know that life happens and sometimes hobbies get put on the back burner for a bit. So with that out of the way here's what's been happening on the Adena Railroad.

Tear Out

In the spring of 2023 while the layout was mostly mothballed, the water line to my refrigerator sprung a leak. Luckily the damage was limited but the repair work required the removal of a section of my Pine Valley Yard at Dillionvale, OH. I had been mildly unhappy with the design for a while so tearing it all out wasn't too painful. The yard passed through stair supports and then jutted out as a peninsula into the near middle of the laundry side of the basement that over time proved to be just too cramped.

Pine Valley tear out in May 2023

It wasn't too hard to find a new home for the Pine Valley, an old layout plan had the yard in a sort of J shape along a far basement wall, but required a swing gate in front of the stairs. This required 15-20 feet more mainline between Adena yard and Pine Valley yard and the chance to model some of the hills and a tunnel between the two points. This addition came with the expense of a coal branch being drastically shortened in place of the new yard location.

The new plan also allowed me to better capture the prototypical track plan of the real Pine Valley yard, thereby enhancing operations to produce the need for a fulltime yardmaster position.

W&LE Pine Valley Yard Valuation Map, partially colored for my own visual reference

Construction

In November 2023 I started the construction of the new mainline from Adena to Pine Valley. I began with completely rebuilding a section that ran behind the furnace to make it easier to remove if necessary. The new mainline needed a constant 1.25% grade from Adena to Pine Valley to allow the main to exit to staging at a particular height to clear some existing benchwork. This also helped to replicate the grade out of the Ohio River Valley and will require double headed steam just like the prototype.

By January 2024 I had the new mainline in place. Scenery will include two bridges over the Short Creek and the Long Run tunnel. The natural spot for the tunnel was where the mainline snaked it's way through the basement stair supports.

New mainline section.

New mainline section, one of the many Short Creek bridges, this one is easily removable for the electrical panel access.

New mainline, Long Run Tunnel and Short Creek bridge section.

In April I made the removable section across the stairs that will eventually become a swing gate. The section slips into place with slots routed out to fit the ends of metal 2x2 L-brackets on each side.

Swing gate section

Surprisingly it's very sturdy 

My Son's last High School baseball season slowed down work but by the end of May, I had completed the box frames for the new and improved Pine Valley yard. I'd love to provide a nice looking track plan of all the changes but I usually work with pencil and paper plus large scale templates, but I'll try to get something together to show.

Pine Valley yard - Freight House/Station area

Pine Valley yard - Yard Office area

Pine Valley yard - yard, rip track, start of engine terminal

Pine Valley yard - Engine Terminal area

If you made it this far thanks!

Monday, July 19, 2021

Building the Ohio River Staging Yard

In my plans to model the NKP's Wheeling District and branch lines between Pittsburg Junction and Dillonvale/Pine Valley Yard, I knew I would need staging yards to hold trains going to or from the east and west ends of the layout.

A large east end staging yard is planned to start just a bit beyond Pittsburg Junction and will represent Brewster, Ohio. A large majority of traffic will flow to and from this direction on my layout, with much of this being coal loads and empty hoppers. As an interesting side note, WESTBOUND traffic was superior on the W&LE and later the Nickel Plate's Wheeling District.

The west end staging yard will begin beyond the Pine Valley Yard at Dillonvale and will represent the eastern end of the mainline at Terminal Junction near Martin's Ferry, Ohio and the end of the Stubenville Branch at Mingo Junction, Ohio. Because both ends of the main and branch follow the Ohio River, I've taken to referring to this staging yard as the Ohio River Staging Yard. The size of this staging yard will be more modest as during a potential 12 hour operating session only 5-6 trains might enter or exit. Mainly the eastbound TT fast freights and the Yorkville locals.

I always knew the Ohio River staging yard would be located under the Adena yard/wye benchwork and connect to Pine Valley with a steep grade and a swing out section but it was originally planned as a stub ended yard. However after laying out some of my 1/4 30" curve templates I realized I could fit a 5-6 track return loop yard instead! I decided to go ahead and build the loop since it would appease my son for running his big modern trains and make operation setup a little easier.

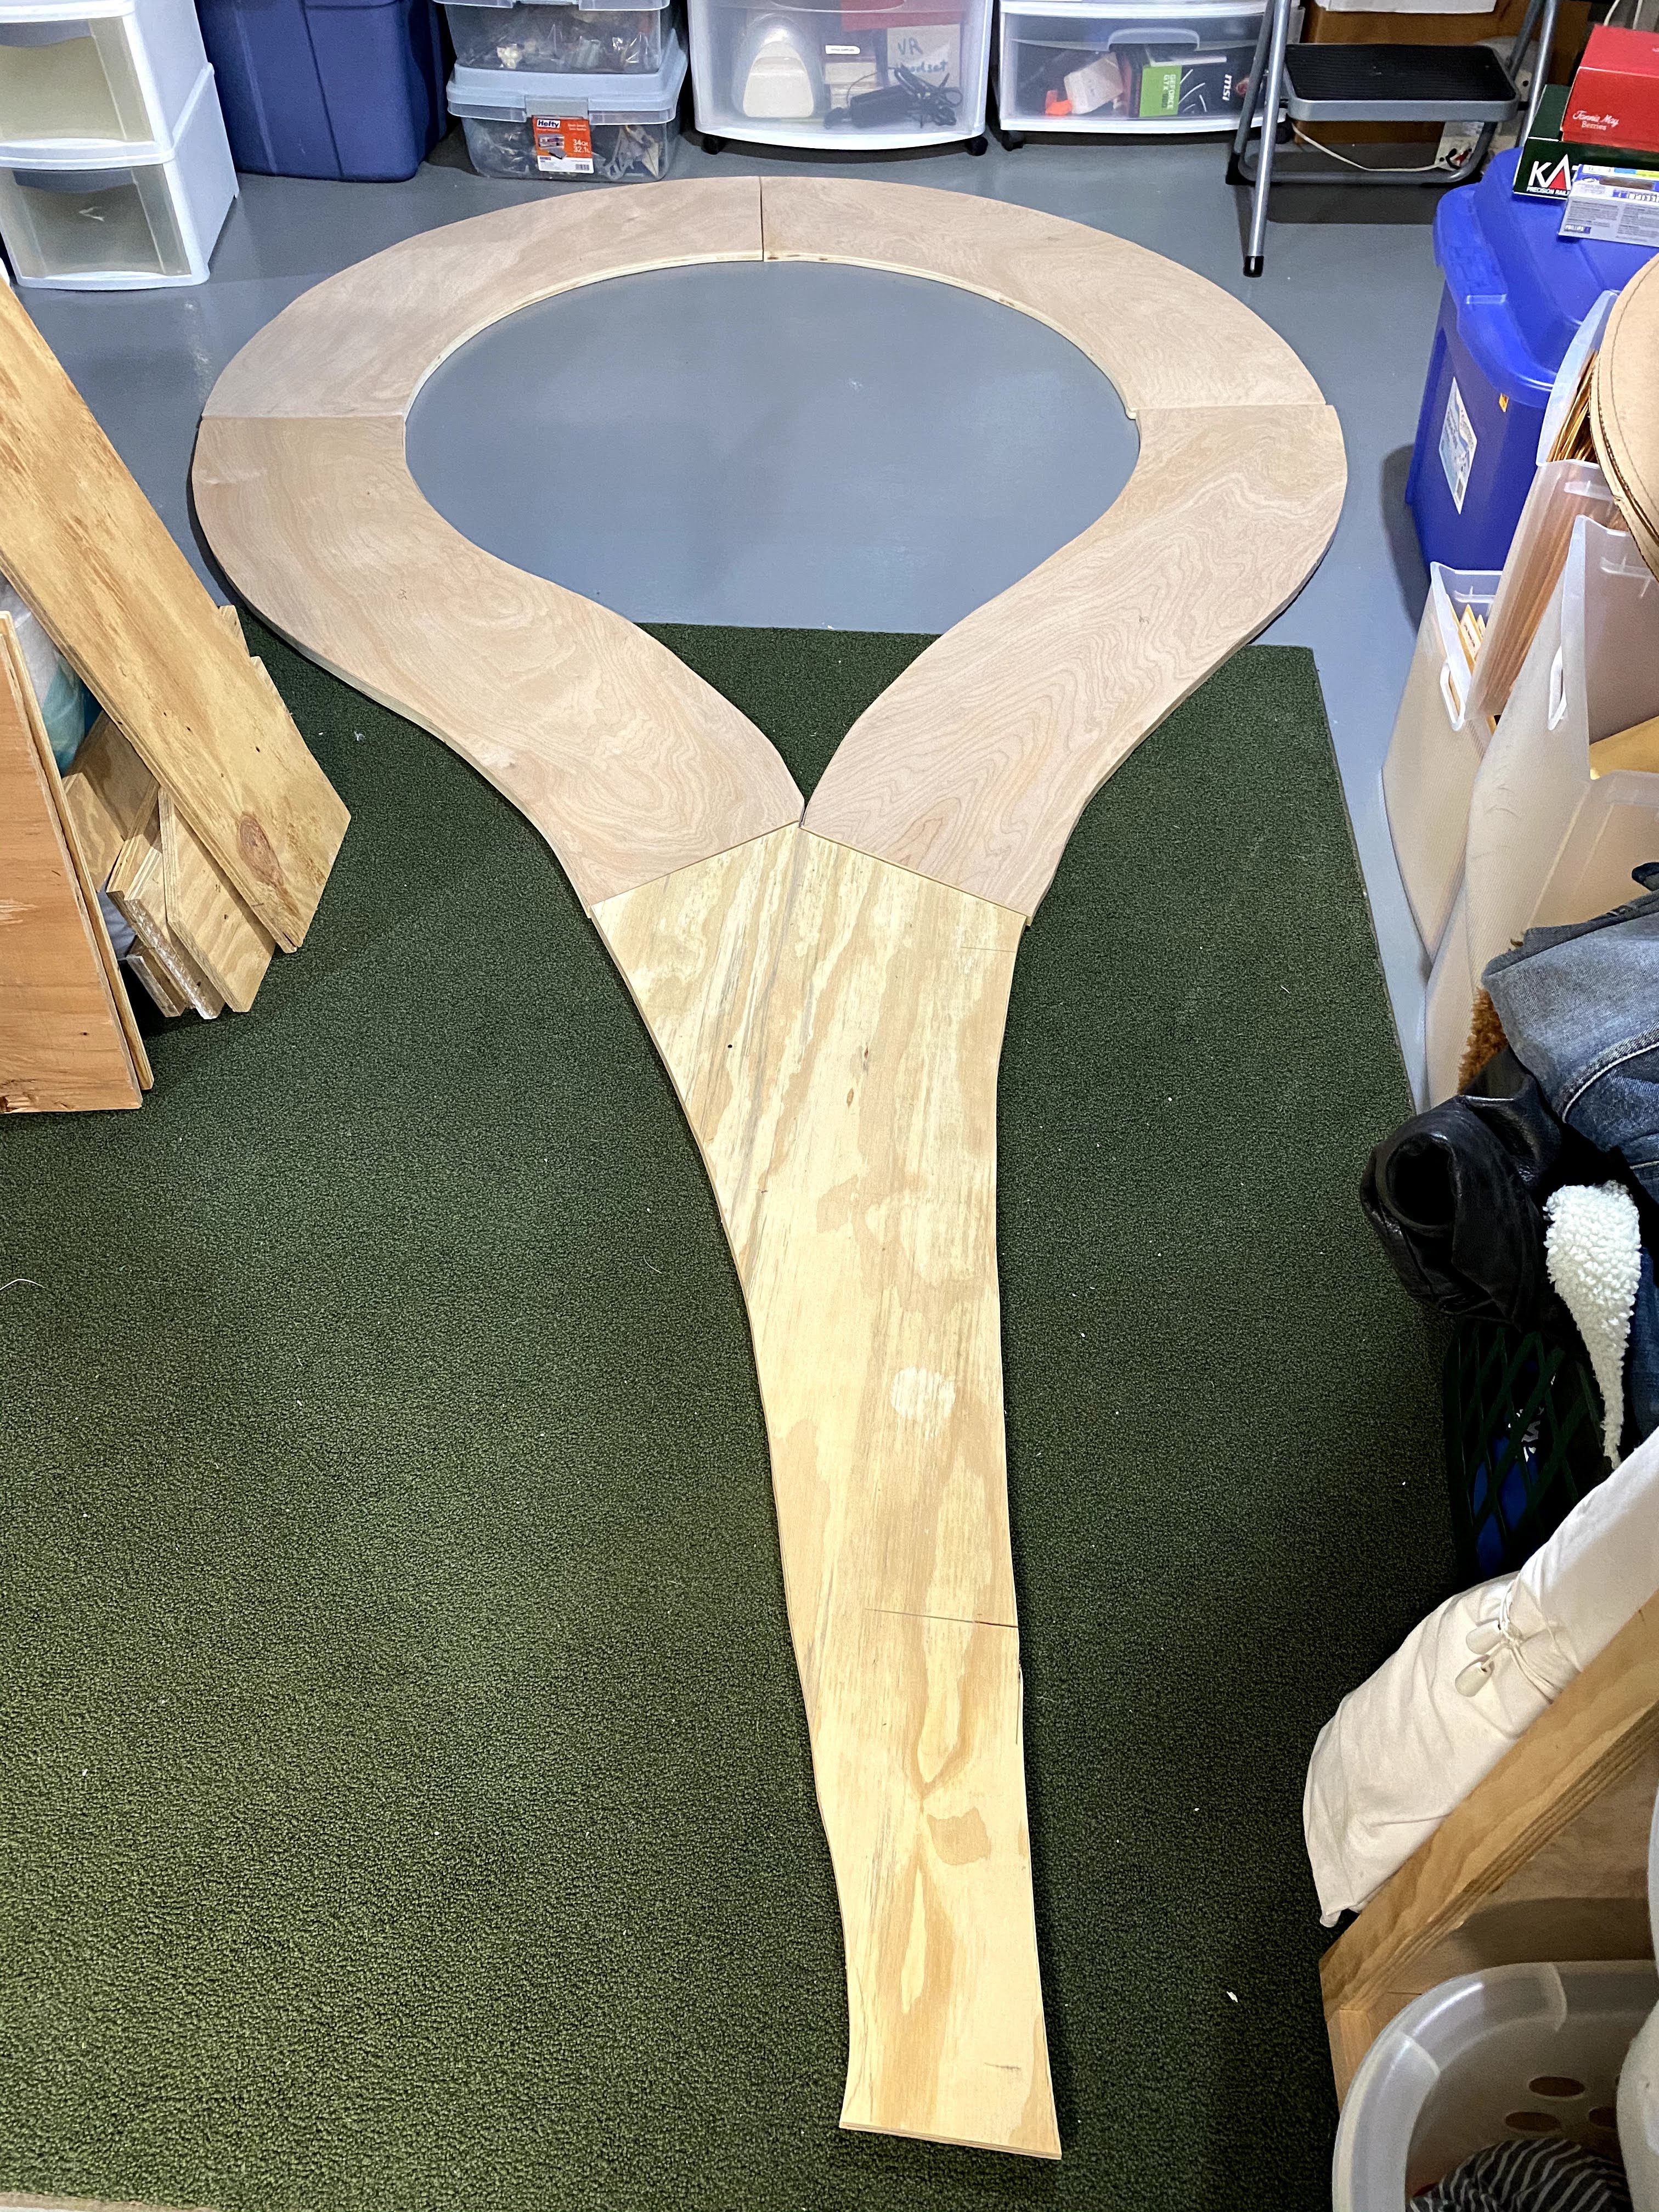
In the spring I started construction on the Ohio River staging yard. I used craft paper to create a template and also to make sure it would fit under the Adena wye in the corner of the room. I used birch plywood to create the 4 curved subsections but I switched to regular plywood for the rest of it when I ran out of the good stuff.

Staging Loop pre-splicing

I spliced all the prices together, installed the needed shelf bracket supports and designed the loop's turnout layout. When I attempted to place an order for the track I found the springtime quarantines and lockdowns had caused a run on hobby supplies and turnouts were out of stock. Around this time the weather warmed and personal developments caused me to loosely install the loop in place and literally shelve any layout progress until about late fall.

East end staging loop temporarily in place under the Adena Wye area

In October our one-eyed kitten Mo took a misstep while exploring the layout and fell off the loop on to the concrete floor below (he somehow didn't land on his feet!). I removed the loop and began work on it starting with some Masonite edge guards originally meant for trains but now serving double duty to protect a kitten with bad depth perception.

Mr. Mo posing with the staging loop and the inside set of guard rails installed.

Tracking laying and wiring started in earnest in mid December after I settled on the yard throat design to maximize the length of the outside track mostly to store and run Brendan's big modern trains.

Planned yard turnout arrangement

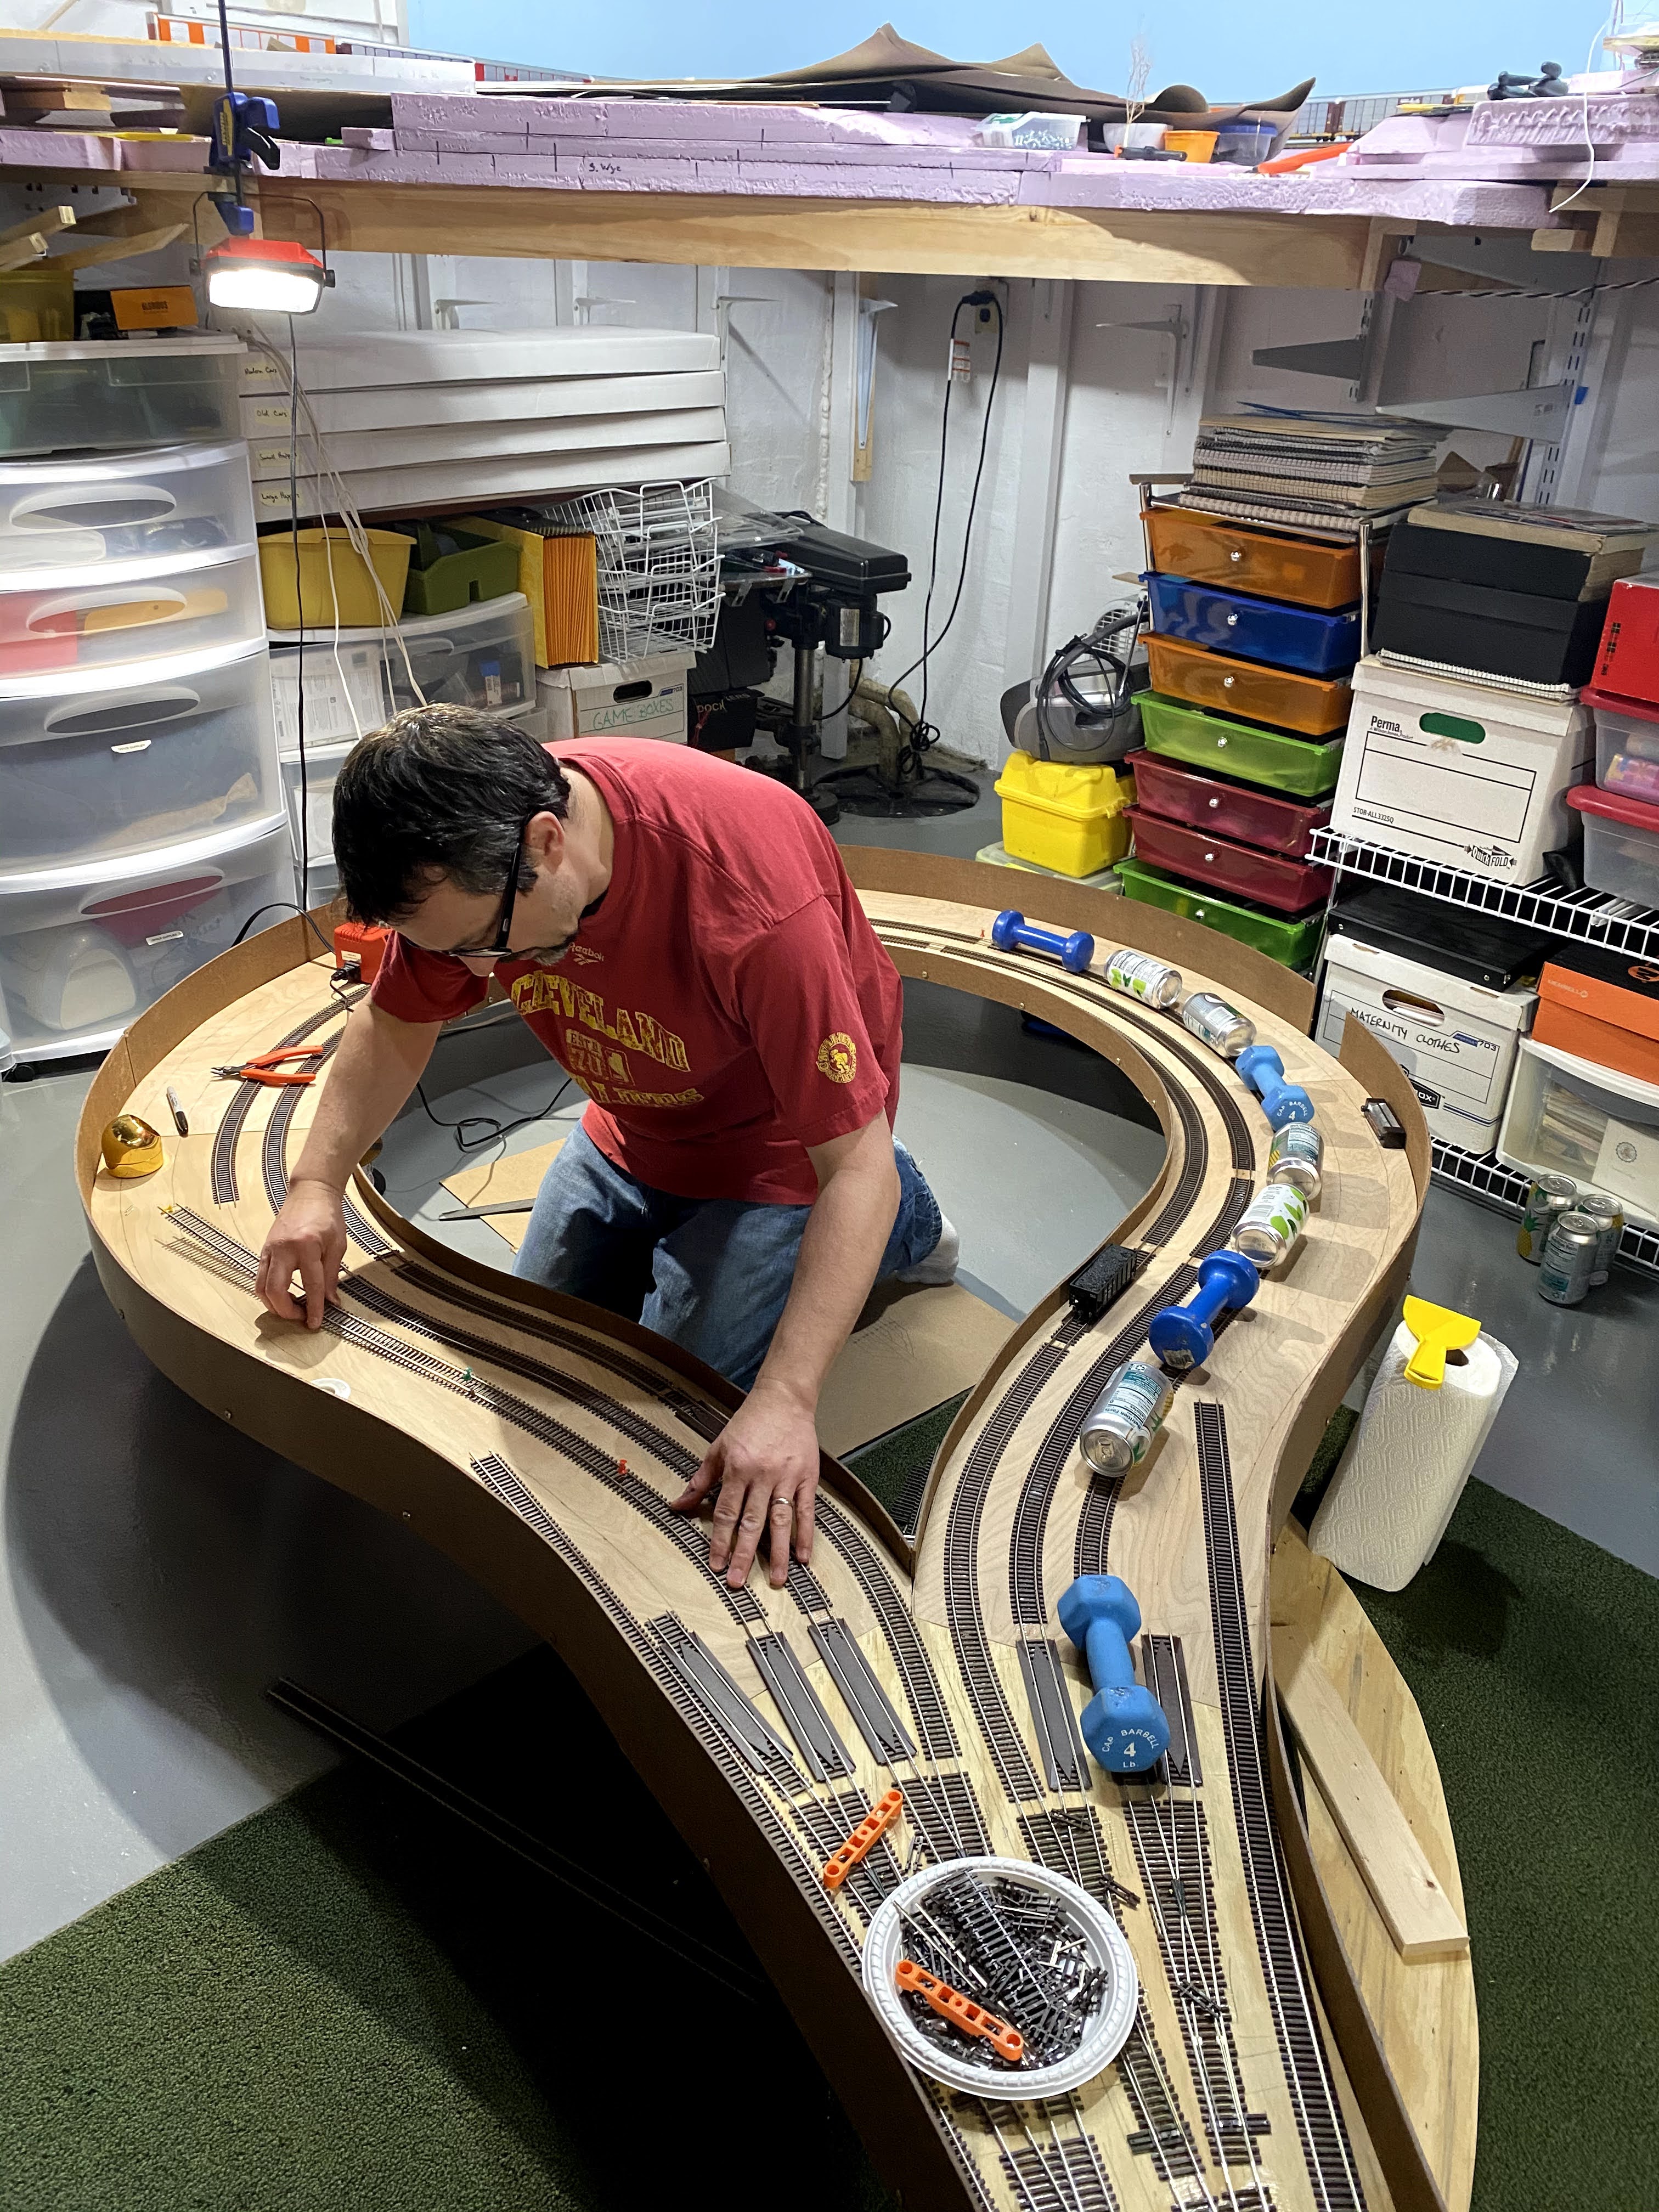
Below are photos of the track being laid and wiring of the feeders.

While the adhesive caulk sets up on one track with the weights on it, I start work on another.


Getting ready to solder feeders


Terminal block for independent power control to the staging tracks


Finished and ready to be lifted into place

Stay tuned for more.


Sunday, December 27, 2020

Getting Back At It

At the start of the Ohio "Stay at Home" orders back in March things looked promising for work on the layout. My workplace had furloughed nearly everybody for a few months and I had a lot of time on my hands. Things were looking good for layout progress!

Then one of the quirks of the pandemic stopped my primary plan to build a staging loop, all the hobby shops I frequent online were all out of turnouts! I had planned on buying Atlas turnouts because my Fast Track tools only take Micro Engineering rail and I already had a large stash of Atlas c83 flextrack for my staging yards. Apparently I wasn't the only one with the same idea of getting extra train work in during this time!  I pushed ahead and built the loop benchwork but by the end of April the weather had warmed enough to begin some outdoor projects. 

Then in early May, Abby, our rescue Greyhound finally reached a point where she had to be put to sleep due to cancer impacting her ability to walk and function. After 11 years on earth she can run all the races she wants on the other side of the rainbow bridge.

Abby "Coupon Lady" the Greyhound

Not much later in May my Dad passed away. He lived a good "second" life for 16 years after a major stroke nearly killed him in 2004 but time catches up with all of us in the end. Below is a classic family portrait of three generations of the Ellis men taken back in 2008 which I'm sure he'd get a laugh out of seeing that photo again.

Three generations of Ellis men, the future is in good hands with the youngest?

It's safe to say I lost any desire to work on the layout for a long while, which I hope explains my absence from the blog. I know I'm not alone in saying 2020 has been a difficult journey for many of us.

This is not to say there weren't any bright spots this year. In the summer we added two new members to the family. We adopted a bonded brother/sister pair of kittens from a local rescue group. They were in bad shape when they were discovered on the side of a road in the spring, but the rescue group did wonders saving them. The orange kitten ended up losing an eye but as you can see they both recovered and are loved in our home. Now named Magnolia (grey) and Mo (orange),  it is my hope they are also kind and loving to my train layout! So far only Mo has taken to exploring the layout and unfortunately since he's missing an eye he does occasionally blunder into things.

New kittens Magnolia and Mo

Recently Brendan has been slowly prodding me to get back to work for which I thank him greatly. The hobby shops must've restocked over the summer as I was able to place an order for what I needed. I recently received all of what I needed to lay track in the staging loop which will represent Mingo and Terminal Junctions. I also decided to order Micro Engineering c70 turnouts for all of the Pine Valley engine terminal. 

Pile of turnouts for Pine Valley and the staging yard loop.

Why purchase c70 #6 turnouts when I can build my own with Fast Tracks tools? Don't get me wrong I enjoy building turnouts and for the most part they are good performers. But right now it just comes down to getting stuff done and enjoying some progress after a long hiatus.

One project we've resumed is painting all that pink foam. It's amazing how a simple coat of black or brown makes an area seem a bit more real and less like a pink Candyland.

Brendan painting the Pine Valley engine terminal a greyish black.

Stay tuned for more!


Monday, March 30, 2020

Backdrop Addition

While I was reenforcing the ends of the removable layout sections which allow for maintenance of the furnace and water heater, I decided it was also a good time to add the backdrop.

Originally I planned to use 16" Aluminum Flashing for the entire length of the scenic portions of the removable sections, however I found the flashing difficult if not dangerous to work with. For example when cutting open the roll I underestimated how compressed it was and had it spring through my hands unwinding itself like a coiled spring. Thankfully nothing got sliced as now is certainly not the time to be going to the hospital.

After that incident I donned some work gloves and set to work. One backdrop piece would be attached to the large section with the bridge. The other piece would be attached to the layout supports and remain in place if maintenance needed to be done.

Unfortunately after attaching the flashing to the large bridge module with screws my son Brendan and I both agreed it looked terrible, too wavy and rippled. The back side of the removable section is very curvy which also made things difficult aside from handling the aluminum sheeting.

So on to plan B. I switched to styrene instead of the aluminum flashing, it's much easier to handle and certainly less sharp.  Instead of screwing the styrene in place I used Loctite Power Grab and glued it the styrene in place. This time things went much more smoothly.


After the glue set the section was removed from the layout again and a piece of aluminum screwed to the back to act as a sort of heat shield from the water heater's exhaust pipe.


The next part of the backdrop would have to be aluminum as it would come in close proximity to the furnace exhaust. Luckily other than a cut out around the exhaust, the rest was simple.


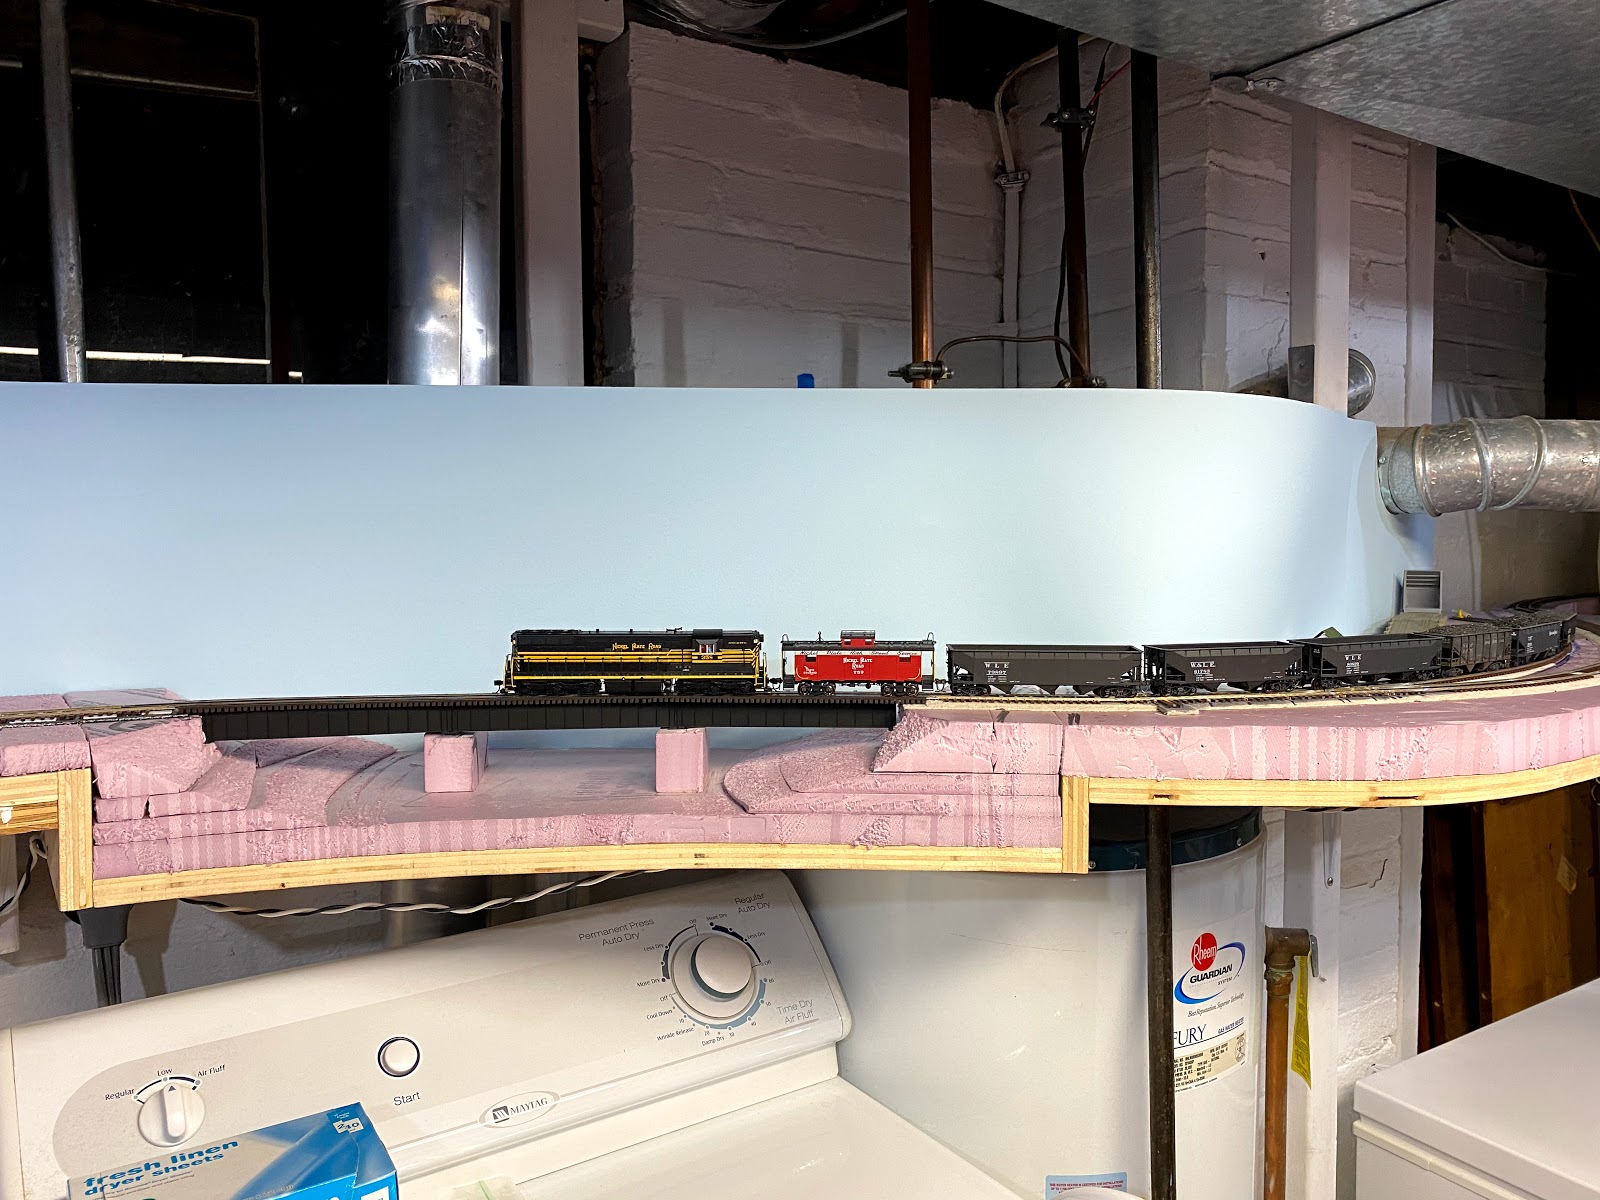
Two coats of Behr's Serene Sky blue paint and the new backdrop was complete.

Nickel Plate Road SD-9 #358 tries out the newly improved sections.


Friday, April 12, 2019

Track work for Adena - Part 5

The wye track at Adena was the busy junction of the Adena RR branchline and the Toledo mainline. The Adena wye is also what I would consider part of a "signature" scene for my layout along with the west end of Adena Yard. So the challenge as usual, is to get the look as close to the prototype that I can in the space I have to work with.

NKP 941, a 2-6-6-2 mallet, on the start of the wye and the Adena RR branch. JJ Young JR photo
Highlighted in red on the valuation map below shows the track I'll be working on next.  Click on the valuation map to see a larger version.

Tracks added in this blog post 4-9-19, Valuation Map from RailsandTrails.com
Aside from laying track I'll also have a lot of bridges to build. The wye itself contains two bridges, one through girder on the main and a large 12 span curved wood trestle bridge at the start of the Adena RR branch. Between the wye and the Adena Tunnel on the main line there were two through girder bridges. Due to space constraints I'll only model the more interesting bridge closest to the tunnel with the Short Creek and a road running under it. Finally just past the wye on the Adena RR branch there are two bridges to build, one wood trestle and deck plate girder combo over the Short Creek and a through plate girder over W. Main St.

Here's photos of the bridges that will be built on the west end of Adena.

Toledo Mainline BR 192.13 over the Short Creek and Blairmont Rd. not too far away to the left is the Adena Tunnel. 4-9-2014 Chris Ellis photo
Toledo Mainline BR 192.67 over the Short Creek inside the Adena wye. 4-9-2014 Chris Ellis photo

Adena Branch BR 0.20 over the Short Creek inside the Adena wye, JJ Young photo flickr.com.

Adena Branch BR 0.40 over the Short Creek. 4-9-2014 Chris Ellis photo

Adena Branch BR 0.60 over W. Main St. Google Maps
Building those will keep me busy, but first I'll need to begin laying the road bed and some of the track to know where these bridges will go exactly.

Here's where the wye at Adena stands before trackwork. A while back I started the through girder bridge 192.67 and it's masonry footings which can be seen in the below picture. You can pretty much only make out two sides of the wye, but all the lines are laid out.

Adena wye looking east toward the yard before the real track work begins.
Adena wye looking west.


The cork road bed is now in place leading up to Bridge 192.67. A layer of the rubber sheet material I like to use and HO scale cork roadbed brings it level with the stone bridge abutments.

Toledo Mainline BR 192.67
The cork/rubber roadbed combo also brings it level with the milled homosote roadbed I planned on using. A difference in foam panel material caused a height problem but the two kinds of roadbed solved that issue. A little lightweight spackle also smooths out a low spot on the main and the seam on the west wye leg as seen below.

Spackle fill out a low spot on the main and a seam transition on the wye.

Mainline part of the wye
For the rest of the roadbed I use Cascade Rail Supply's milled homasote branch profile roadbed. All the roadbed whether it be cork, rubber or homasote is glued down with the DAP clear adhesive caulk.

The homasote roadbed goes in for the west end of the wye
Homasote roadbed cut for the west end turnout.


The west end of the Adena wye is anchored with a #8 curved 32"/25" radius turnout. I built this one freehand with a paper template before I received my Fast Tracks fixture. In order to fit the yard and wye along one wall I had to curve the west end of the wye. I was able to keep the 30" mainline radius on the outside but had to drop down to 24" for the inside of the wye. This brought the turnout pretty close to the backdrop which should make scenery there interesting.
.
The turnout ready to be spiked down after the headstock ties get glued in.
After the west end of the wye was "laid in stone" I began laying the other two legs of the wye which mark the beginning of the Adena RR branchline. The track being held up by a small container on the right will be where the long curved trestle bridge (BR 0.20) is located.

The beginnings of the Adena Branch
Next up more track laying and construction of the benchwork for the other two Adena Branch bridges.

- Quick links

Track work for Adena - Part 1
Track work for Adena - Part 2
Track work for Adena - Part 3
Track work for Adena - Part 4
Track work for Adena - Part 5