Here's a quick look at where the layout is at now.
 |
| Looking Adena west and still working on getting those yard curves down on the paper template. |
 |
| Looking eastward at the Adena wye. |
- The remainder of shelf brackets installed for the Adena area.
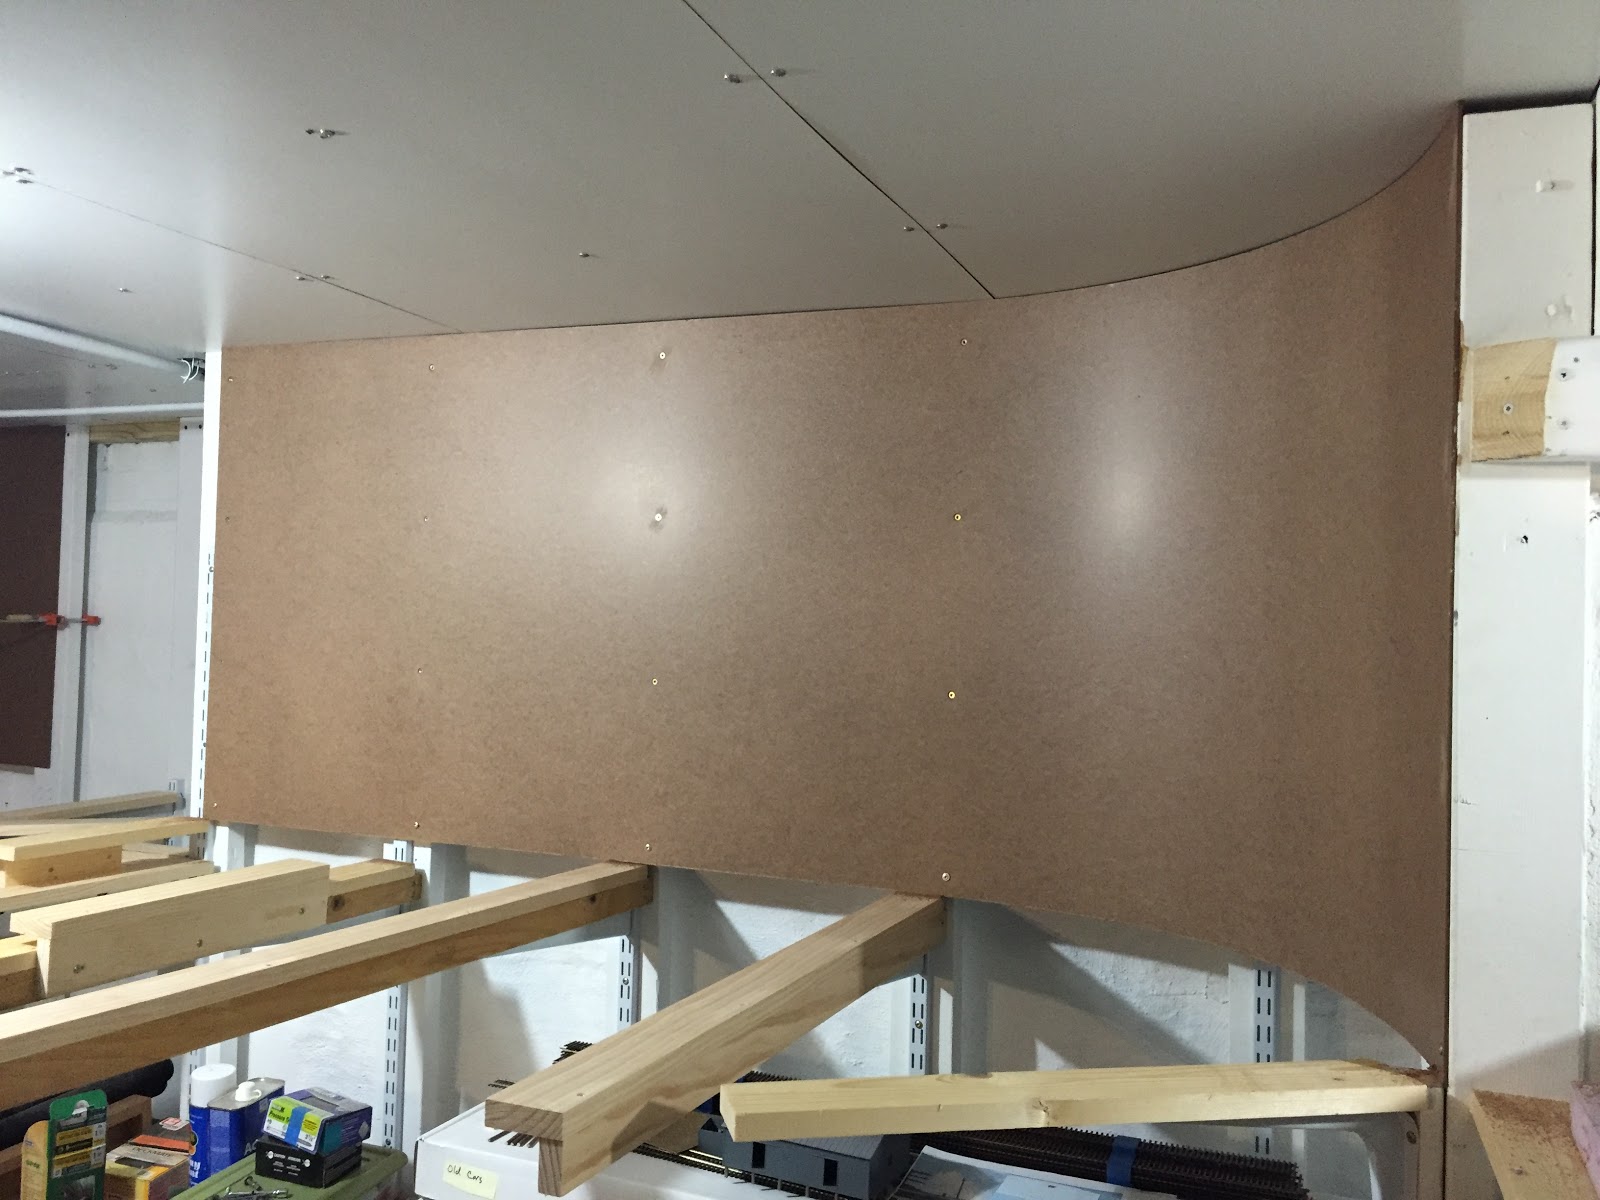
- White-coated hardboard panels installed as an inexpensive ceiling to protect the layout from dust filtering down from above.
- Combination of Hardboard and Styrene attached to the wall studs for a backdrop.
- Backdrop screw holes and seams filled, sanded and painted a nice light blue color.
Shelf Brackets
First things first, finishing the shelf brackets for the Adena-side wall.
 |
| Yes, my wife Jessica approves of this arrangement. |
 |
| The small brackets have an upward tilt. |
 |
| Shimmed up. |
Ceiling
The next project on the list was to tackle the open ceiling. I know from experience having the old mocked up versions of Pine Valley Yard sitting in my basement for months at a time, a fine dust and grit seemed to rain down from the floor above. To keep the layout as dust free as possible something had to be done. I'd been kicking around the idea of using a low profile ceiling tile system but that kind of expense at the moment vetoes that idea.
A visit a couple years ago to Mike Mathie's Canton, Ohio Nickel Plate Road layout provided the idea I would need to solve the ceiling issue. I recall his ceiling looked like he had simply screwed whiteboard into the floor joists. Being distracted by his impressive layout I never got the chance to ask about the ceiling, but I filed away what I thought I saw for potential future use.
The first ceiling area I wanted to do is where the large space eating Adena wye will sit. Now would be the time to get this done before further construction made this area impossible to work above.


Twenty five dollars got me two 4x8 sheets of white hardboard and a box of lathe screws to experiment with this method for a cheap ceiling. The hardest part was accurately notching the panels for the wall studs and fitting things around the main water pipe hanging from the joists. I also painted the water pipe white to help it disappear. Notching the panels around the studs will help give the hardboard backdrop a nice fluid meeting point to the ceiling as not all the studs are perfectly in line with each other. I plan on going back and using white paint on the screw heads and touching up some of the white panel pieces that are showing their brown edges.
Is it perfect? No, but if you're looking at my ceiling then I'm not doing a good job with the layout or operations. Yes, there is the possibility that over time a few panels could sag a bit, but for now I'd call this a success and will use this method over other parts of the layout as I continue.
Backdrop
I went with a common material that many layout builders use for their backdrops, 1/8" 4x8 sheets of Masonite board. At Home Depot this is called Eucaboard and runs about $7.99 a sheet. It can bend to a pretty tight radius and I knew I could use it for my three inside corner curves. However I had two other wall corners that would have a severe outside radius, and for that I visited my local plastics supplier for a sheet of polystyrene plastic. Piedmont Plastics was happy to sell me a 4x8 sheet of .040" thick styrene for about twenty five dollars. Considering what I pay for tiny sheets of styrene at a hobby shop I thought that was a great deal. Plus what I didn't use for the backdrop would give me enough material for years of structure scratch building.
 |
| Adena wye area. |
 |
| Adena Yard area |
Next I cut out sections of styrene for the two outside corners and Loctite Power Grab adhesive was used to attach the plastic to one side of the hardboard backdrop.
 |
| Loctite Power Grab |
 |
| Caulked |
 |
| Spread |
All went well until the bend shown in the photos above and below. I failed to make that panel long enough which put the stress of the bend too close to the gluing area. In order to help the panel stick I had to screw a wood brace into the plastic panel and the hardboard below.
 |
| Braced |
 |
| This one turned out fine unlike the curve in the background. |
 |
| Even running a shop vac while sanding couldn't help control the dust. |
Paint
The color one chooses as their blue sky can be very subjective depending on time of day (obviously) the season, weather or even geographic location. I found plenty of discussion on this topic in this thread on the Model Railroad Hobbyist forums.
One of the blogs I follow is Alan's LK&O Railroad mainly due to his exceptional craftsmanship and his modeling of the Akron Canton & Youngstown RR of which I live very close to their former mainline in Akron. In the MRH forum topic, Alan very kindly put together a collection of various blue sky paints used by other modelers. I knew from his blog his color choice was already my favorite and calling my wife over for a second opinion quickly made it unanimous.
I love using Behr paint so off to Home Depot I went for a gallon of Serene Sky 540C-2 in a flat finish.
 |
| Ready to paint! |
 |
| Still wet. |
Lessons Learned
I definitely learned a lot from phase of layout construction.
- Masonite board is cheap but it is very time consuming to work with compared to the sheet styrene.
- If using styrene for a corner only, be generous with the length to help absorb the stress of the curve.
But mainly I learned this;
If I could do it over again I would just use the sheet styrene in a .060" thickness and do it exactly like Pierre Oliver on his Wabash layout as described in his blog.
Why? As I mentioned above Masonite is very time consuming and can be difficult to work with. The eight foot sections I was working with can be heavy and unwieldy for one person to easily handle. It must be screwed to the studs or wall and all those screw holes must be countersunk then filled along with the seams for appearances sake. The sanding and sawing is also a huge mess. Using hardboard took me well over a week to complete the section you see in this update.
Even though the cost of the sheet styrene is about three times as expensive as hardboard, I could've completed this side of the basement in as little as two days. Mainly because it's easier to work with, just score and snap with a utility knife to cut the pieces you need. I could use the same Loctite glue to attach it to the studs with the occasional screw or staple for support. Only the joints between sheets would need some bondo putty for a finished look, and not a hundred screw holes to fill either.
Would I trade an extra $60 to be more than a week ahead of where I am now? Absolutely, considering the value of the time I spent working with the hardboard could been translated to other projects.
Anyways if you read this far, thanks! Next up will be to hang some temporary lighting, finalize the yard plan and start cutting some roadbed.
Wow, nice progress! Won't be too much longer before you are laying track.
ReplyDeleteThat was an amazing find with Piedmont Plastics. I'm curious to see how it works out over time as backdrop material. Might be worth getting some sheets in different thicknesses for structure building too. Like you said, buying it in bulk like that has to be a lot cheaper than buying it in small packs through hobby vendors. I wonder if they have trim scraps they would sell?
Piedmont Plastics was very helpful and has many different thicknesses in stock. I did't think to ask if they had any scraps as they are just a wholesaler, damaged pieces could be a possibility. It was neat to roll up a 4'x8' sheet of styrene and put it in my little Toyota. Can't do that with a sheet of hardboard.
DeleteAn amazing project!! Love keeping up-to-date on this blog!
ReplyDeleteI'm amazed myself at how things are coming together! Thanks for reading!
DeleteChris,
ReplyDeleteThe space is coming together just like you had envisioned. The coved corners REALLY turned out well. As others have said, can't wait for the next installment on the blog!
Thanks Tim! Hopefully track laying is not too far away in the future.
Delete